280
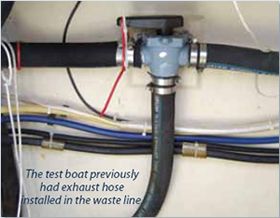
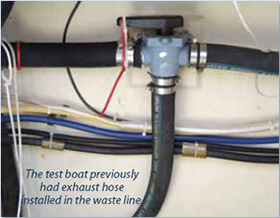
While model holding-tank testing allows side-by-side comparisons, there’s nothing like on-the-boat testing to sort out practical differences. Our test boat, a PDQ 32, had been plumbed with a mix of low-end vinyl sanitation hose and water exhaust hose; the rubber hose was permeated, cracked, and discolored, and the sanitation hose was permeated to the point of having a thin film of sticky goo that had condensed on the external surface. A textbook case of time showing the weaknesses of poor material selection.
Testers re-plumbed the sanitation system using pieces of each hose type reviewed in this article. We’ll see how they hold up. Because they are not in identical exposures, the field test won’t offer direct apples-to-apples comparisons of permeation resistance. However, we did learn a few things about the hoses’ installation differences.
Head to tank: We used Shields Poly-X here because it appeared to be the toughest hose that would make the bends. As with many marine head installations, there is a hose bend leaving the head, and the SeaLand OdorSafe Plus hose had no chance of making the turn. As it was, we put a slight kink in the hose trying to force it into the previous tie-down locations. We ended up working the kink out and moving the tie-downs a few inches. This hose required a bit of pressure to slide on the fittings, but no lubricant was needed, and it sealed up nicely.
Holding tank to vent: We chose fabric-reinforced clear vinyl tubing, so that we could see what was going on. Since this boat is also a test bed for holding tank vent filters, we wanted to be able to monitor overflow behavior and the water trap. (For details on this installation, see “Avoid Plugging with Proper Vent Installation,” March 2012.) The boat had been previously plumbed with the same tubing to the vent, and it was badly yellowed and permeated. Clear vinyl is easy to work with and very flexible, but it’s prone to collapse if bent even a little too sharply. In fact, after a few months of testing, the clear vinyl loop collapsed, and we replaced the section with Shields 148 white vinyl sanitation hose, one of very few sanitation hoses commonly available in ¾-inch.
Holding tank to Y-valve: We again chose Shields Poly-X. It parallels the fill hose for part of the run, and this insured matching turns.
Y-valve to pump-out: Petroleum tank truck hose was fitted here two years ago and is doing fine, so we left it in place, for comparison. It is most similar in fitting to Shields Poly-X.
Y-valve to discharge pump: We used the Trident 102 here. The bend radius was long enough, and the hose slid on the fittings easily. The liner is soft enough to seal easily. Testers found the 102 to be a very solid hose that is a pleasure to work with.
Discharge pump to seacock: We used the SeaLand OdorSafe Plus here. This section was an easy run so hose stiffness was not an issue. However, we had to heat both ends to get the hose to go over the fittings, and the seacock end was still quite difficult. (Note: SeaLand does not recommend heating hoses.) Although this hose was the most difficult to fit, testers noted that it was probably the best-looking in the test field, so the challenging install may be worth it for use in exposed locations.
General observations & tester tips:
• We can easily see using more than one sanitation hose to plumb a boat, each serving where it fits best. It also seemed clear that the head-to-tank, tank-to Y-valve, and Y-valve-to-pumpout hoses were the most deteriorated.
• Before you buy expensive hose, be certain it will make the required bends. Check out the accompanying Value Guide to get an idea of each hose’s stiffness.
• Ambient temperature matters. All of these hoses were much stiffer when the mercury dropped. We wouldn’t choose to tackle a hose fitting job when it’s colder than 70 degrees. Use a space heater on the boat, if necessary, in the winter.
• Flush a lot of clean water through the hoses first.
• PVC-coated palm gloves are a big help when muscling hose through bulkheads and onto fittings (PS Chandlery, February 2012). They are also good for handling yucky old hoses.
• Glycerine is a good lubricant choice when trying to fit hoses. It’s compatible with all sanitation hose types and will eventually evaporate, leaving no slippery residue, unlike soap. Do NOT use petroleum compounds on sanitation hose. EPDM and butyl rubber sanitation hoses are very vulnerable to petroleum compounds and will be damaged.
• Do not use silicone caulk to seal hoses. It only makes a mess for the next time hoses are changed, and it increases the probability of leaks. If the hose is leaking, check the barb.
• Use two all stainless-steel hose clamps, 180 degrees apart, to shore up connections. (See PS Advisor for more on selecting hose clamps.)
• Except for white vinyl hoses, all sanitation hoses are wire reinforced. The cut end of the wire is needle-sharp, so secure it under clamping bands to prevent a puncture-wound hazard. You can cut it off flush, but it’s safer to pull it out and secure it.
• Inspect the bulkhead pass-throughs and smooth as needed. You can seal the pass through with caulk to prevent motion and possible chafing.
• Don’t cut the new hose to length based upon the old hose. The securing points and fit will change if you switch to a different hose type.


