

 Used Boat Review")


Your anchoring system is only as strong as its weakest component, which includes not only the rode, but also shackles, splices, mooring bitts, cleats—in short, any gear used to secure your boat while at anchor. Proper maintenance includes inspection of these as well as laying the rode out for thorough examination at least annually. Start by inspecting your anchor. Are there bent shanks, flukes, or other damage? If galvanised, is the coating in good shape, or are there areas of rust and corrosion?
RODE WORTHY
Next up is the anchor rode, which can be a combination of rope and chain, or all chain.
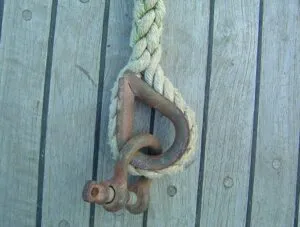
For combination rodes, start by inspecting the rope-to-chain connection, which will be made via a rope-to-chain splice or by utilizing an eye splice and thimble (which in turn will be attached to the chain portion via an anchor shackle).
Direct splices should be tight and the link it connects to free of corrosion. Eye splices should have a minimum of six full tucks and be seized at each end while the eye is under tension (to prevent the thimble from falling out as the eye stretches when placed under load). Ensure all shackles are properly sized and that all screw pins are moused (secured) with stainless steel wire NOT plastic tie wraps (a requirement for all chain rodes as well).
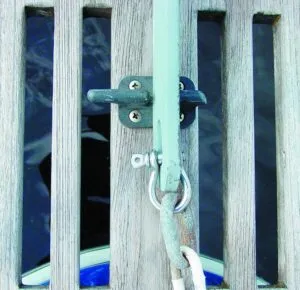
Check the rope portion of the rode for wear, hard spots (due to heat generated friction caused by placing a kinked line under load), cut strands, aging, discoloration, etc. Chafe is a rope rodes worst enemy, so you’ll also want to check hawseholes, chocks, cleats, windlasses, etc, for burrs, sharp edges, protruding hardware, or anything else that can cause rode damage.
While chain is tougher than rope, it’s not maintenance free. Start by storing your chain clean and keeping it as dry as possible to reduce corrosion (and odor).
Avoid exposing your chain to preventable chafe, such as pulling your chain along that concrete dock while laying it out for inspection. Dragging your chain over abrasive surfaces removes the galvanized coating and eventually leads to rusting. Chain should be swapped end-for-end annually to promote even wear of the galvanized coating. Chain should be replaced or re-galvanized once rust begins to appear, however the latter should be done no more than twice, after which the chain should be replaced.
GROUND TACKLE DEPENDS ON CONNECTORS
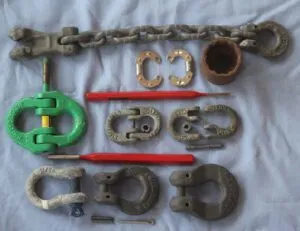
If you must temporarily join two shots of chain, common methods are the riveted connecting link, the double jaw midlink, and the quick-connect link (see sidebar, below).
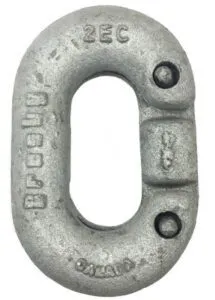
A riveted link looks like any other link. If you use this type of link, make sure that it meets federal code, as well as the load limits for your chain. Crosby is one maker of such links-the G335 Missing Link, right.
For easier replacement, PS recommends high-strength, Omega and hammerlock links. These are used in the lifting industry. Choose G100 quality. You will need two omega links, but only one hammerlock. They are usually painted, not galvanized, although Peerless has a zinc electroplated 3/8-inch G70 hammerlock (see PS Advisor).
A double-jaw midlink can also serve as a temporary connector, as can a chain shackle. Chain shackles are U-shaped, as opposed to anchor bow shackles, which are bow-shaped to provide greater freedom of movement. Whatever you choose, you’ll want to source from a quality supplier and ensure and working load ratings meet or exceed that of your chain.
Chain rodes should be pulled and inspected at least annually (depending on use) but particularly after exposure to severe loading. Loading on a chain rode isn’t very high under normal conditions, however damage can occur when the chain is wrapped around an object (rock, wreck, etc) and placed under tension.
If you find your chain slipping or jumping out of the windlass wildcat (chain wheel) more than it typically has in the past, it could be a sign some of the links have been damaged and the chain may need replacing.
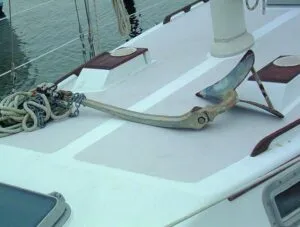
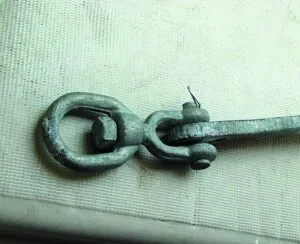
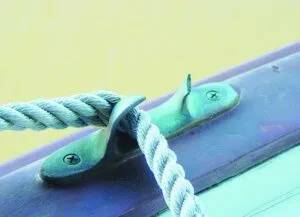
ROGUES GALLERY
A marine surveyors life would be a barrel of fun if the outrageous stuff they uncovered wasn’t so dangerous:
Frank Lanier photos

Capt. Frank Lanier is an accredited marine surveyor with over 30 years of experience. His website is www.captfklanier.com.
C-link – Also known as a connecting link, this is the standard option when you want to permanently join two chains. We only recommend Crosby’s joiners. If peened correctly, this will last for years (see above). They are highly reliable. They will pass through the appropriate gypsy. They do need to be regularly checked for corrosion. Although they are galvanized, you can easily damage the galvanizing when you rivet the halves together. They demand aggressive use of a heavy hammer and should not be peened on deck, which can be damaged in the process. Try to find something to use as an anvil. Never weld the joint, or you will destroy the temper.
Mid-link – Also called double -clevis links, these can have the same strength as the chain—but check the specs. They will not pass through the gypsy. They are secured to the end-link of each shot with a clevis pin and the clevis pins are secured with a cotter pin. This is a simple means to join two chains. We would suggest looking for product from Peerless (3/8-inch, #8057435). These are zinc electroplated (not hot-dip galvanized), which is adequate for occasional use.
Quick link – This is an open oval of steel closed with a long threaded nut. It is very easy to use, but we don’t recommend it for high loads. It is not as strong as a double clevis and will not be as strong as most anchor chain.
Shackles – You will need two rated shackles with the clevis pins passing through each end link. If you use properly rated shackles they will be stronger than the chain. We suggest Crosby’s galvanised G209A, which can also be used as primary anchor shackles. The shackle pin must be moused (or use Loctite, which will set underwater). This is a bit clunky but safe link.
Omega link and hammerlock – These are used in the lifting industry, and if you choose G100 quality they will be plenty strong. You would need two omega links, but only one hammerlock. They are usually painted, not galvanized, although Peerless has a zinc electroplated 3/8-inch G70 hammerlock (#8153255). You can replace the Omega link’s hammer-in set pins with cotter pins, which are easier to inspect, install, and remove. Ketten-Waelder offers G60 components, hammerlocks and Omega links, in their Cromox (duplex stainless) range. These will be more than strong enough and are corrosion resistant. They are expensive. Spencer Industries might have Armorgalv (galvanised) coated hammerlocks and Omega links.
In our view, the cheapest, and most secure semi-permanent option would be a G-100 Hammerlock, but watch the corrosion. A Crosby C-link will serve more permanent solutions. For a quick fix, use an appropriately rated Crosby screw-pin shackle.


