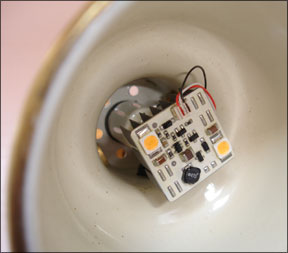
A Permanent Mount for the Sensibulb LED Reading Light
By Thomas Wetherbee
I have always been a big fan of brass berth lights, but have never really liked the halogen bulbs commonly used in them. The little halogen bulbs run hot, use a lot of power, and are prone to vibrating loose. When Sailor’s Solutions (www.sailorsolutions.com) introduced the Sensibulb, I quickly ordered a couple to test in our custom built boat Suzy. They worked so well that I converted all six of our berth lights.
The original Sensibulbs were nice units, but the mounting system was iffy. I elected to bypass the mounting system by removing the ceramic bulb holder and directly gluing the bulb support post to the back of the Sensibulb. It makes for a stronger mount, and it positions the Sensibulb deeper in the lamp for a more pleasing distribution of light. It also eliminates the ceramic pin socket, which is frequently a source of trouble.
The new Sensibulbs have an improved mounting system, but I still prefer gluing them directly to the fixture. If you want to do this, the process is simple. Just follow these steps:
1) Remove the bulb support post from the inside of the lamp fixture by unscrewing the knob at the top of the lamp.
2) Remove the two small screws attaching the ceramic bulb holder. Remove and discard the ceramic bulb holder.
3) Use alcohol to clean the end of the support post and the cooling fins on the back of the Sensibulb. This will remove any oil that might interfere with the epoxy.
4) Hold the bulb support post upright in a vice or clamp and drop a glob of epoxy into each screw hole and onto the top of the support post. Center the Sensibulb on the support post, fin side down, allowing the epoxy to stick to the cooling fins.
5) Once cured, reassemble the Sensibulb and support post into the lamp fixture


