Each spring I make a list of boat projects that includes routine maintenance and a few important upgrades. Inevitably, the work is cut short by the need and desire to launch Viva, our 1975 Tartan 44 test boat, before too much of the short New England season has elapsed.
Last fall I vowed to get a head start on the work. The routine chores such as bottom sanding and applying two new coats of Cetol to the cockpit teak Id leave for spring. Instead, I concentrated on the major upgrades-installing the deck fittings for anchoring an inner forestay, removing and opening up the rudder to determine the source of rusty water weeping out, and replacing four bent stanchion bases.
During the warm autumn months I removed all the interior liners covering the hull-deck joint in order to access the stanchion base nuts. Once the four bases were out, I covered the deck holes with duct tape. Tops In Quality of Marysville, Michigan made up new ones with 10 angles, drilled for through-bolting rather than tapped for the usual Allen screws, and drilled drain holes at the bottoms of the sockets. They were prompt and the price was quite reasonable.
My plan was to install the new bases before covering the boat for the winter, so that the interior wouldnt remain a shambles, hindering other work. Unfortunately, by this time it was January and snow had fallen. Too bloody cold to work on deck. I worried about the sealant freezing. And when Bill Seifert, who used to work at Tartan, advised setting the backing plates in a polyester putty to fully distribute loads, I knew the job would have to be postponed until spring.
I turned my attention to the inner forestay fittings and rudder. On the former, I got as far as making cardboard templates for the metal pieces I intend to bolt to the forepeak bulkhead, but then the yard called to say theyd lifted Viva off its poppets and the rudder was out.
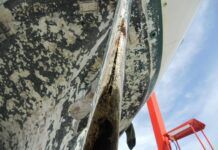
With much effort, I got enough of the rudder into the trunk of my car to transport it to our shop. Lugged it upstairs and onto a workbench. Then I began to cut open the seam joining the two fiberglass halves, using the vibrating cutting wheel on my new Fein finishing sander. It makes a great boat tool. Rudy Nickerson, who makes a lot of parts for old Pearsons, including rudders, said he just rips the seam with a Sawzall. It took a days work my way, but at least the cut was clean.
After much prying, the top half of the rudder popped off. Using the chisel attachment on the Fein, I cut away enough urethane foam to see one of the three carbon steel plates that are welded to the rudderstock and fiberglassed to one side of the rudder. Indeed, it was discolored with rust, but looked like it would last another 20 years. Oh well. But it was too late to just seal up the rudder. I was committed to removing all of the foam. And as long as the rudder was open, I might as well weld new stainless steel plates to the rudderstock.
As I write, about half of the foam has been removed. Its slow. Once done, there is still the problem of chipping out all of the rock hard putty used to bed the rudderstock. Im tempted to hand the whole mess over to the yard, but am afraid of the cost.
How to proceed? None of the boatbuilders from whom Ive sought advice seem to agree on what sort of adhesive should be used to seal the two halves. Nor what sort of filler should be used to fill the cavity. Nor how best to seal the rudderstock to the rudder. They do seem to agree that the seam should be glassed over and faired, a practice skipped by many builders.
Im taking photos at each step and once its all done, hopefully before Labor Day, well publish in PS.
-Dan Spurr


