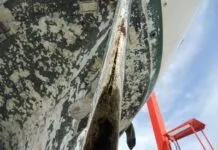
The irregular shape of welds makes them difficult to inspect using ultrasound technology. Visual inspections can also be deceiving-especially with new welds. The prettiest bead can have internal voids and poor fusion. After a while, that pretty bead will begin to bloom with corrosion and cracks.
Critical welding, be it oil tanks, high pressure steam, or commercial shipping, all have minimum inspections standards, but the recreational marine repair industry does not. A full-blown X-ray inspection is overkill for minor hole repairs, but the welder needs to follow some basic steps to achieve the best results. The task is complicated if the alloy is unknown.
For new fabrication, the welder should prepare a test sample, joining two 2- to 4-inch strips of the metal to be used together, welded in the orientation in which the welder will be working (if it is overhead, they must be welded overhead).
When finished, chip the slag away and inspect closely for cracks. Cut the sample into strips about 1-inch wide, crossing the weld at 90 degrees. Clamp the test strips in a vise and bend them backward against the weld. A properly welded 90-degree angle should double over without cracking the weld.
Welds can also be checked for cracks and voids using a penetrating die. After welding, chip away all slag, grind smooth, and inspect as directed using a penetrating dye.
For welded tanks, diesel fuel has an uncanny way of finding pinholes. You can paint the inside of the weld with diesel fuel, wait 24 hours, and inspect for any evidence of seepage.
For more on non-destructive testing, see “DIY Materials Testing” from this issue.


