It is always discomforting when you know, and actually feel, that something is not quite right. For a little while now, while navigating under power, I felt some “new” vibrations that simply did not feel right. Putting the boat safely on autopilot, I went down into the cabin, opened up the rear engine cowl and realized it was the propeller shaft that seemed to be the origin of the vibration. It was either caused by poor shaft alignment which turned out not to be the case—or something else was causing this issue.
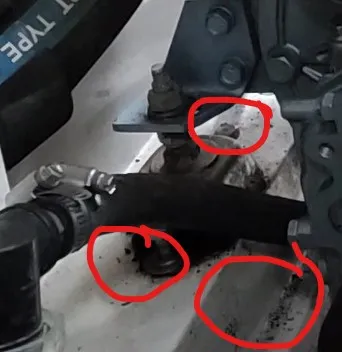
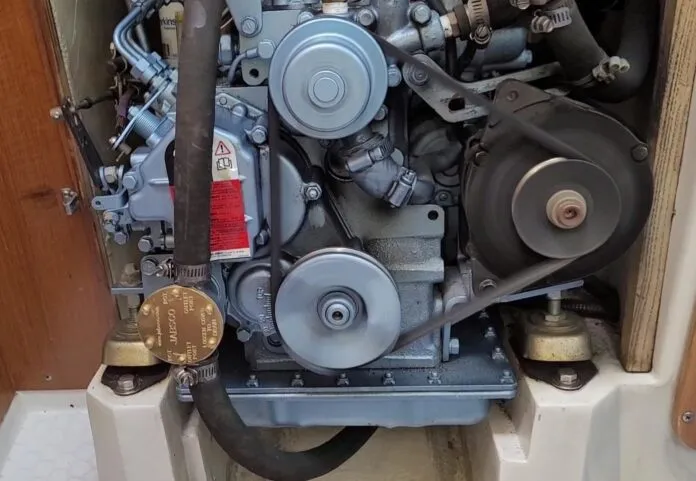
While inspecting the engine mounts, the most likely culprits, I noticed the rear, port-side engine mount was leaving a lot of rubber dust and residue around itself. With the engine stopped, I was able to actually move or twist the mount by hand. These are tell-tale signs of engine mount wear and, in the case of that particular mount, a possible and imminent mount failure, which is the last thing anyone of us would want! Excess vibration throughout the transmission, prop shaft, and pro tunnel can cause structural damage, including possible water infiltration. Also, if a mount were to actually break, all the above plus engine damage can be the result of badly worn engine mounts.
With the engine mount so worn, in addition to its close proximity to the transmission and prop shaft link, caused the excess vibration while under load, both in forward or reverse. Plus, it means the starboard rear mount has been compensating by taking on extra stress, therefore it was also getting more wear and tear.
As the mounts are original, around 27 years old, it would make no sense to change just one mount. Is it more work? Yes of course, but if one is about to fail, the chances are, the others are not far behind. So, using my philosophy that “maintenance costs much less than repairs,” I ordered 4 new engine mounts. In my case, the engine is a Perkins M20 diesel, so I ordered these from Part 4 Engines in the UK. I also ordered the matching hardware. If you’re going to change things like engine mounts, you might as well change the nuts and bolts too.
Another thing I personally consider important when changing engine mounts on a sailboat is to make sure the mast is up and the , as this will ensure proper prop shaft alignment. I also recommend having the boat in the water, not sitting on a cradle or trailer, for the same reason. At least plan the final engine-to-prop alignment when she’s in the drink and the rigging is properly tensioned. Checking and adjusting rigging tension is an easy DIY job with a proper tensioner gauge and matching your rigging diameter to the proper tension. This should be done at least once at the beginning of the season and once more mid-season.
In most cases, the tools needed are basic: Proper size wrenches, a ratchet, sockets and extensions, and a sparkplug feeler gauge set. I also used the space-saver scissor-action jack from my car to hold the engine in place as a backup safety, while I removed and replaced each mount one at a time.
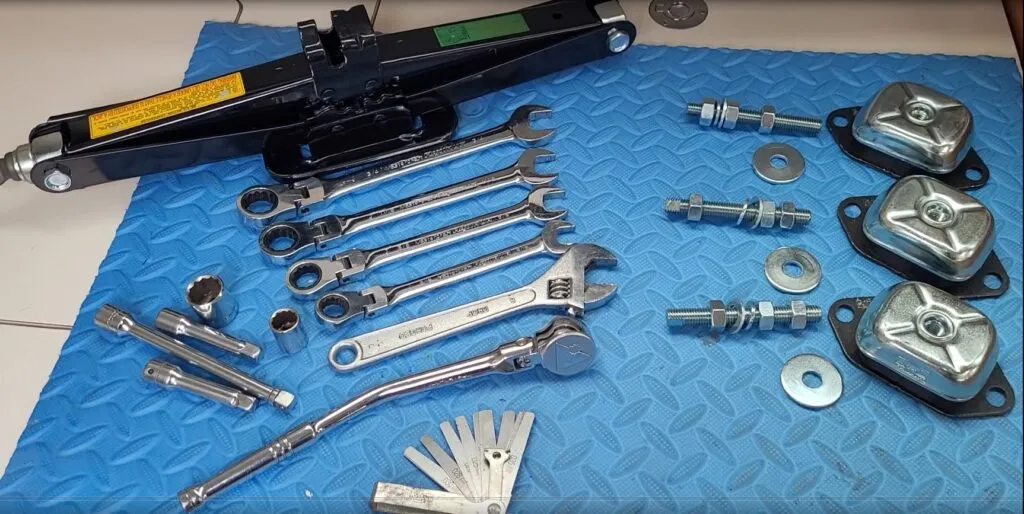
Once you’ve removed everything around and opened up all accesses to the engine and prop shaft, use wood blocks under the engine to hold it in place. I used the car scissor-action jack from my car. You’re not looking to raise the engine. You just want to apply enough pressure to hold the engine in place, should something go wrong. But since I replaced one mount at a time, the jack was used simply out of an abundance of caution.
You now need to remove the nuts and bolts holding the transmission output flange to the propeller shaft flange.
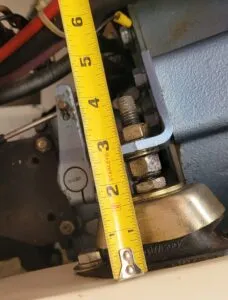
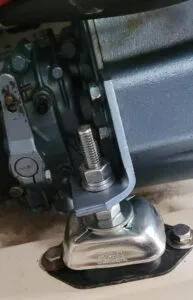
As best as you can, measure and note the current distance between the mounting base and the top or bottom of the mounting plate on the engine. In the example pictured, the starboard rear mount is 2.75 in. from the support base to the top of the mounting plate. Do this for each individual mount, as they may seem the same, but many times they are not, as I learned on my engine, where the front, port-side mounting flange was larger and higher as it also held the alternator.
These measurements will only serve as a benchmark or starting setting as, over the years, the chances are good that the original mount rubber inserts have compressed, compared to the new ones. This is why the last steps will involve aligning the engine to the propeller shaft. Engine-mount rubber compression is also the reason why checking the alignment with a feeler gauge is recommended as a regular maintenance check, based on your engine hours. I check mine every three years. With the new ones, I will check again in the spring.
Now, one by one, remove and replace each engine mount. Using the measurements you took, set the height of the engine mounting plate to the base of each engine mount.
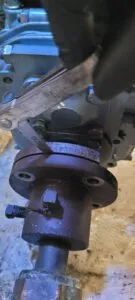
Once each one has been replaced, it’s now time to align the engine to the prop shaft. To do so, use a sparkplug feeler gauge and check the “fit and feel” on top, sides and bottom between the transmission output flange and the prop shaft flange. If, for example, it is more open on the bottom, the front of the engine needs to come down. Now rotate the prop shaft and check again. Do this a few times, as it will confirm the shaft is sitting properly centered in the prop shaft tunnel. If any adjustments are needed, do these slowly in only quarter to half turn increments at a time. Recheck the alignment with the feeler gauge and repeat until the alignment is perfect. Remember to lower or raise the engine equally on each side (port and starboard) for each adjustment.
Once you’re satisfied with it, properly tighten each engine mount and re-attach the transmission and prop shaft together. Double check everything has been properly tightened.
Start the engine. From the engine compartment, keep the RPMs at idle to see how the engine is responding. Increase and decrease the RPMs. Now, switch into forward gear and see how the shaft and engine are running. Is the shaft rotating and the engine running smoothly with no vibration? If not, stop and do the alignment step again. Increase the RPM and observe the same. Now go into reverse gear, idle and at higher RPMs. Observe the engine mounts too!
If you’re a hand’s on do-it-yourselfer with basic tools on hand, you can do this. But some boats require acrobatic skills such as an engine deep into the bottom of the boat. These more difficult installations may require hiring a pro. However, you can still carry out the diagnostic by looking and feeling for the telltale signs. And get them replaced before one gives way!
For the benefit of any interested reader, you can see my own mount replacement on this YouTube video:




I subscribe to practical sailor for authoritative reviews. The recent videos are of not this quality. I hope this returns to the previous quality. thanks chris
Hello Chris, I’m sorry you don’t like my videos. I am simply a sailor and DIYer and like sharing my experiences with others. Hopefully you can at least appreciate the information being shared.
Best wishes and fair winds always!