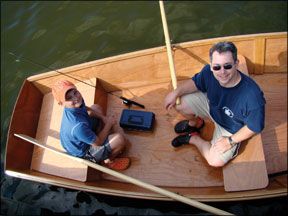
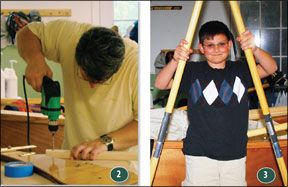
Boatbuilding is a test of Archimedes Principle of buoyancy, but it also harnesses mans impulse to turn dreams into reality. For the father-and-son team of Matt and Alex Zerphy, the process of designing and building their first boat became much more than a self-guided excursion into Woodshop 101. The experience turned into a total immersion in a process filled with challenges and rewards, and as 12-year-old Alex put it: “The best part about building our sailboat was being with my dad!”

Photos by Ralph Naranjo and Jeni Kocher-Zerphy
Matt, an ex-nuclear submarine officer with a degree in physics and no formal shipwright training whatsoever, teamed up with his son and turned their garage and a few handheld power tools into a makeshift boat shop. Perhaps the most impressive fact is that the Z&S (Zerphy and Son) team made their first cut on April 5 and launched their boat on June 15-of the same year! This despite the fact that Matt has a full-time career, and Alex couldnt dodge the homework requirements that come with being a full-time student.
Unlike many boatbuilding projects, this one began without any plans. Matt and Alex developed the lines of their sailing skiff, and transferred them onto large sheets of 3/8-inch Sapele and Okoume plywood. Merging their own ideas with pictures of similar designs, they created a cardboard scale model of their versatile sailing skiff. Their intention was to create a boat that was easy to row and could double as a skiff for father-and-son fishing trips.
During the design process, the would-be naval architects scaled their model to match Alexs action figures, Darth Vader and Luke Skywalker. The plan was to use the figures to analyze rowing thwart positions, mast-step location, and centerboard slot, as well as the positioning to develop the sailplan and sheet-lead details. The Star Wars surrogates fit the model well, and made ergonomic simulation part of the design development process. Fortunately for the project, Matt and Alex got along much better than the father and son action figures.
In the Garage
By opting for a hard chine stitch-and-glue approach to boatbuilding, many arduous labor hours were removed from the equation. To ensure that the flat plywood hull bottom would have a symmetrical shape, the two used a simple curved template that could be flopped over to draw the cutting lines. One side of the hull bottom was traced, the template was flopped, and then the other side was traced.
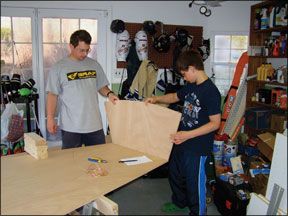
Two wooden horses acted as the strong back (support for the hull), and by weighting the flat ply bottom in the middle, a desired amount of rocker was induced into the hull shape. The bottom and each side of the hull required two lengths of plywood, and these were joined with a screwed and glued butt block. Matt decided to use a butt joint instead of a scarf because it is a reliable joint that is easier for the novice builder.
The butt joints stiffened the hull slightly near the joint, but this was not a problem because the joints were deliberately located at nearly flat hull sections, not near the point of maximum beam where radius changes are more abrupt and the extra stiffness would have affected the curve. Though less high-tech than a scarf, the butt block joint was made with epoxy and offers the novice builder a durable and easy method to join a plank, strake, or panel. And by picking compatible grain patterns to join, the end result is quite acceptable.
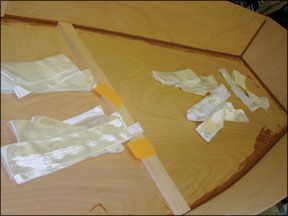
The building technique that the Z&S team used is commonly referred to as “stitch and glue.” Using clamps for support, the Z&S team drilled holes diagonally through the bottom and side skins of the boat, and then used copper wire stitches to temporarily secure the plywood sheets. With neither a jig nor a strongback to stiffen the assembled parts, theres a tendency for the evolving structure to twist on the centerline axis, and care must be taken to maintain its bilateral symmetry. Extra clamps can help tame the twist, and temporary athwartship members can be placed to coax the bottom and sides into the desired shape. Later in the building process, laminated strips along the gunwale added more stiffness to the shape.
Once the sides, bottom, and transom had been wire-twisted (stitched) together and coaxed into symmetry, an epoxy filleting paste was mixed and applied to all the seams connecting them. Care was taken to maintain as smooth and even of a radius as possible.
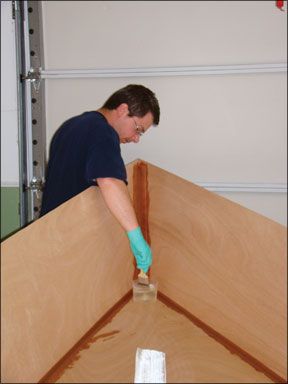
The putty used began life as a batch of carefully measured and mixed resin. The mixture was dosed with a filleting blend of powder that thickens the resin to a sticky peanut butter-like consistency. By going slowly and lavishing careful attention to detail, Matt kept the putty where it belonged. His cosmetic approach to controlling the “bead” resulted in a smooth, uniform fillet, that when combined with fiberglass tape, stiffened the assembly of large flat surfaces, turning them into the nucleus of a boat.
Matt decided to apply the fiberglass tape before the filleting putty had cured. Structurally speaking, this layer of fiberglass tape, bonded completely with the epoxy paste, helping to turn the sides, bottom, and transom into a one-piece monocoque hull. Once the fiberglass “tabbing” cured, athwartship members were bonded to support the rowing thwart, and the gunwales were glued in place adding additional support to the structure.
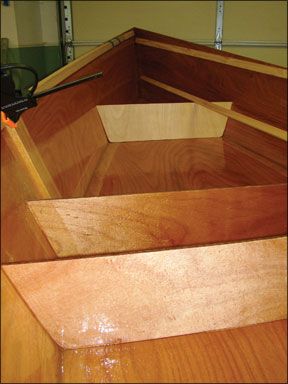
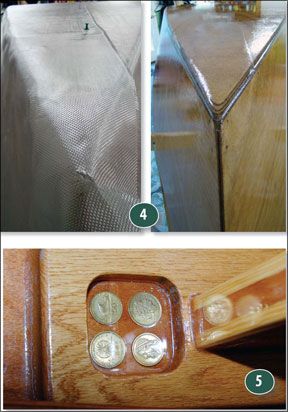
Soon, the skiff was ready to be turned over and have the exposed twisted copper wire stitches clipped, the chines slightly beveled and sanded smooth. Next a layer of fiberglass boat cloth was carefully bonded to the hull, using epoxy resin and a combination of roller, brush, and squeegee for the application process. The plywood was effectively encapsulated under the fiber-reinforced plastic (FRP) skin. By eliminating as much air bubble and void content as possible, the ability to maintain a bright finish was preserved.
The Z&S crew discovered that epoxy resin is a magnificent adhesive but a difficult material to control on a vertical surface. Matt, like every modern boatbuilder, quickly learned that its much better to carefully control and spread resin during the layup process rather than slathering it on and later having to sand off all the hangs, beads, and curtains once it has turned rock solid.
Matt and Alex did a fine job coping with the art of epoxy application, but even so, they discovered how much time can be spent with a long-board, leveling the finish the old fashioned way. He and Alex wanted the satisfaction of building a boat with a bright finish. A light colored enamel might have reduced some of the time spent on cosmetics, but if you enjoy the process, why skimp on the fun?
Conclusion
Sharing the boatbuilding process with a child or a grandchild is like passing along an important piece of family history. For many sailors, boatbuilding can be the ultimate do-it-yourself project. The skills derived pay off as extra dividends when it comes to repairs or fitting out projects aboard larger sailboats. The structural skills acquired while gluing, bonding, and laminating can be transferred to larger or smaller projects, and the best way to develop finishing skills is to practice on smaller surfaces such as a sailing dinghy or kayak.
The investment in power tools need only be minimal. Even with just an electric drill, saber saw, belt and orbital sanders, and a circular saw, youll be ready for action. A simple array of hand tools will round out the shop needs: a couple of hand saws, a few chisels and a wet stone, a block plane, and a homeowners tool box with a hammer, pliers, and screwdrivers will do. Clamps are always in too short supply, but creativity usually comes to the rescue.
If your first project intensifies the boatbuilding bug, there are catalog collections of designer-like hand tools, cordless wonders, and table saws that can increase your capability. A fringe benefit of the backyard boatyard is the new fleet of little boats that take shape, just the kind of craft that can interest kids in “messing around in boats” and perhaps help to keep a family sailing tradition alive.


