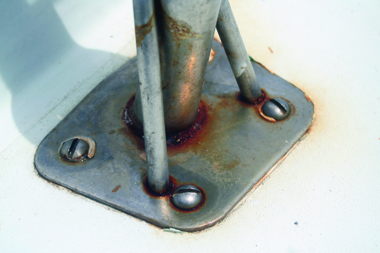
Moisture with little or no oxygen invites rust. Salt, which helps to hold moisture, is a catalyst for the process. This is why rust normally starts at the base of bedded stainless-steel hardware, at longitudinal joins of rolled handrails, or in pitted areas. Welded areas have a higher susceptibility to corrosion, because heating stainless can destroy its stainless qualities. That’s why it is better to cut stainless steel by hand with a hacksaw than with an electric cutting wheel, which overheats the metal, causing stainless steel to rust where it was cut.
Polishing discoloration from stainless steel can actually wipe away evidence of impending doom. Colored dye test kits and a magnifying glass can help to detect defects in stainless steel that lead to failure. But even new stainless hardware can unexpectedly fail. Stainless chainplates and mast tangs are notorious failure points due to cyclical loading and corrosion penetration at minute cracks. Our special report Marine Metal Warning, delved into this topic.

To get a brilliant, long-lasting finish, manufacturers of high-grade marine hardware give their 304 and 316 products an electropolish. Electro-polishing involves bathing metal in a mild acid with an electric current. This takes away all the impurities and makes the stainless shine. Old stainless-steel hardware can be removed from your boat to be electro-polished again.
Even if you don’t electro-polish, you can bring stainless back to a shiny condition that helps ward off corrosion. Brightening the stainless also gives you an opportunity to inspect the hardware.
What stainless-steel deck hardware likes best is plenty of fresh water and mild soap to rinse away moisture-retaining salt and grime. On long, rainless ocean passages, it can be helpful to scrub down the decks, even with buckets of seawater, to reduce the concentration of salt residue. To eliminate the salt without wasting precious water, follow this rinse by wiping down with a wet rag soaked in fresh water. Don’t use chlorine cleaners as these are highly corrosive.
Getting out the shinola kit and buffing stainless steel before it rusts is a good practice. For longer lasting results—especially in welds or other areas where rust has developed—a passivation step can prolong protection against corrosion.


Our test of rust-stain removers showed that the most effective cleaners usually contained phosphoric acid or oxalic acid. Pastes were preferable. A jar of runny cleaner can spill easily, and any acid must be thoroughly rinsed, since the acid can harm gelcoat. This is one of the reasons Practical Sailor as well as industrial standards now prefer citric acid-based formulations like those described in “Stainless Steel Passivization Testing” (including our own super-cheap DIY formula). These formulations can be used almost entirely without buffing (no buffing in most cases), resulting in stain-free stainless and extended protection against corrosion.
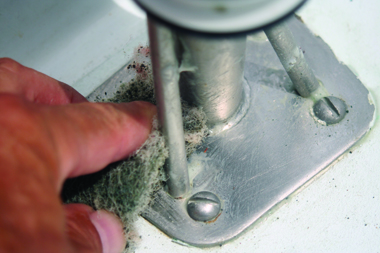
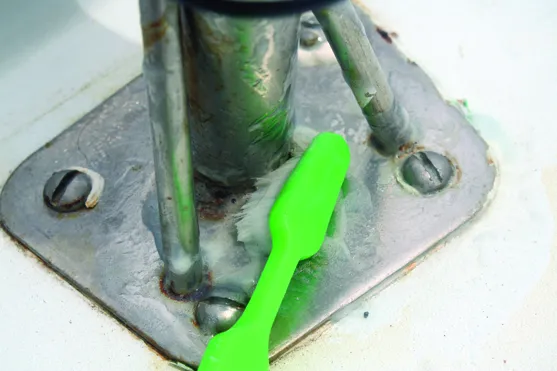
When applying a paste cleaner, a toothbrush is useful for buffing tight spots and working into the pores of welds; follow by buffing with a cotton cloth. A green, 3M scrubby pad helps remove more aggressive stains. Continued rusting in welded areas might indicate developing failure, requiring replacement. Rust can also be effectively treated with a longer passivation treatment. The report passivating stainless steel, also describes the proper dwell time required for for full effect. Rinse thoroughly with fresh water and mild soap when done.
Applying one of our favorite cleaner waxes or one of the best polish-protectants from our metal polish test will help protect against corrosion, but, this protection doesn’t last long. One of our top-rated corrosion-block sprays will offer slightly better protection, but some of these products are quite sticky, so they will pick up dirt.
Generally, a regular fresh water rinse is all you will need to preserve the tough protective oxide coating that high-quality stainless steel naturally forms with exposure to oxygen. However, in many cases — welding, cutting, and deeper corrosion pitting — an extra step of passivating the stainless steel will provide further protection. In our stainless steel passivation testing, this simple inexpensive step proved very effective in warding off future corrosion.
All this close, hands-on attention not only keeps the stainless looking bright but can prevent a major failure of the rigging. The close work makes it easier to inspect components, and the cleaning will often uncover cracked turnbuckles, wire end fittings, and other hardware problem before they fail.
For more on cleaning stainless and dealing with other problem boat stains, check out our e-book Essential Cleaners, part of a three-part series on marine cleaners.


In fact, the citric acid-based formulations in “Stainless Steel Passivization Testing” were used almost entirely without buffing (no buffing in most cases), resulting in stain free stainless and extended protection. It is now preferred to other acid chemistries, by both PS and within industrial standards.
Barkeepers Friend, the pump spray-on version, works very well. A ‘magic eraser’ pad can be used to touch up the more resistant areas. This works not only for the Stainless Steel but for any gelcoat in close contact.
Barkeepers Friend is very cheap and extremely effective without a lot of extra scrubbing and without any nasty residue.
Thanks, Evan, I’ll give it a try!
I’ve noticed that a lot of the new top quality Korean cables (not the cheap Chinese stuff) show signs of light corrosion almost immediately after rigging so can this method be used on stainless steel rigging/lifeline cables and turnbuckles – especially where the cable meets the turnbuckle. Is it safe to put the paste around that junction as long as you rinse it thoroughly afterwards? Might make for an interesting test. Keep up the great work!
Since 316 stainless steel is rated for long term citric acid exposure, there is no risk of leaving it on too long. Phosphoric acid and oxalic acid can cause staining if they dry in place. Citric acid can stain 400 series stainless alloys (some knives, for example); there are products buffered to a greater pH for this application.
Bar Keepers Friend or FSR, and a toothbrush. Perfecto.
Rinsing is the hard part.
https://svbrightwater.wordpress.com/2016/11/22/rust-on-rust-off/
Hello all you Practical Sailer folks.
I have been using The Works, a bath and shower cleaner, for keeping Shooting Star’s stainless deck hardware rust free. Spray the pieces once or twice a day, no rinse needed, for two to three weeks. The rust stains will fade away day by day with no work needed. The Works also works for soaking ugly stainless steel things for a day or two to remove rust stains.
Mike, on Shooting Star