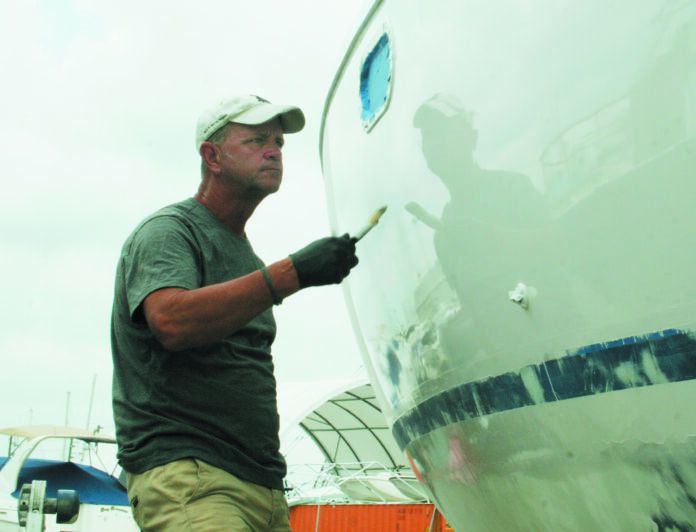
After the first round of my complete hull refinish of my 1971 Yankee 30 at Salt Creek Marina in St. Petersburg, FL, I’ve moved on with the more challenging part, the deck refinish. With about 100 hours in the rearview mirror, I’m finally close to removing all of the old monourethane and primer which had completely failed after 8 years. Had the previous owner recoated the boat three years earlier, I likely would have been saved this tedious step.
Although I know I can achieve better results by removing all the deck hardware, I’ve decided not to do this because I’m eager to go sailing this winter while the weather is fine. I figure I’ll touch up around the hardware as I re-bed it in stages over the coming year. This blog post is primarily an overview of the many articles we’ve done on paints and refinishing old hulls, many of which I’ve used to guide my own work.
(Note: One of the easiest ways to peruse our archives on this topic is to search “topside paint” on the Practical Sailor website https://www.practical-sailor.com/?s=topside+paint. Subscribers will see additional links that are not open to the public by going this route — such as our most recent test of non-skid paint. If you will be upgrading your non-skid paint, a search under “non-skid paint” will point you in the right direction (https://www.practical-sailor.com/?s=nonskid+paint). And of course, searching bottom paint will yield a vast amount of research (https://www.practical-sailor.com/?s=bottom+paint)
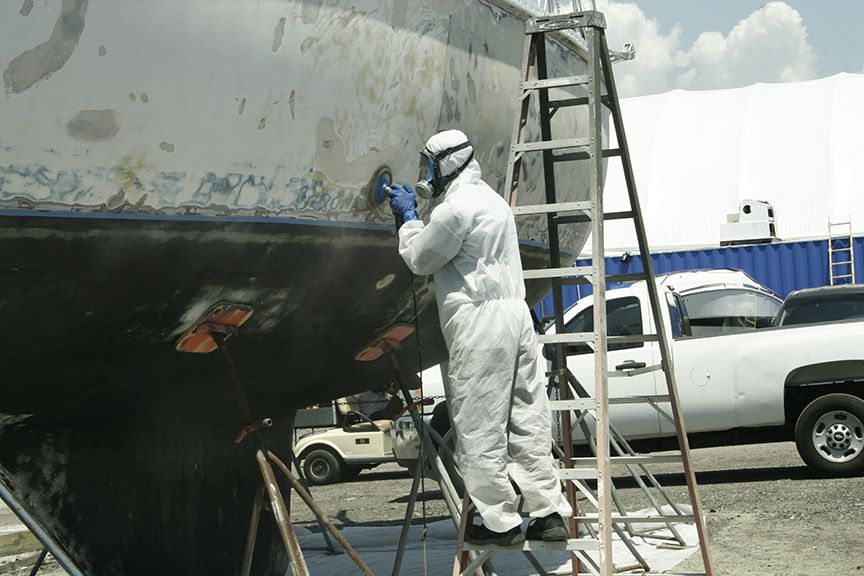
A high-quality finish begins with proper preparation, and Practical Sailor’s hands-on refinishing projects on crafts ranging from an 11-foot sailboard to a 41-foot Ericson offered our experts plenty of insight into prep-work challenges. Preparing the hull’s surface for painting is a laborious process, but if you review the primer on prepwork and our do-it-yourself notebook that accompanies our topside paint test, you can save time and avoid the most common pitfalls. If you are set on a do-it-yourself spray paint finish, former technical editor Ralph Naranjo walks you through the process in a sidebar to his extensive, three-year-long topside paint test. These articles offer a good foundation for getting a high-quality finish without shelling out thousands of dollars for a professional paint job.
As Naranjo demonstrates in multiple test boat projects, probably the biggest challenge comes when working with two-part paints. These are usually more sensitive to temperature and humidity than single-part monourethanes or acrylic enamels, which typically are less glossy and less durable than two-part paints. The trick to getting a perfect two-part finish is achieving the right balance of flow and cohesion, so the paint does not sag, run, or orange-peel. This is why we recommend novices undertake a few practice projects like oars or a dinghy before tackling an entire hull.
The quality of your painting tools also makes a difference. For one of our test hulls (a Catalina 22), we used the two-person roll-and-tip method, which entailed one person applying the paint with a roller and the other tipping the rolled-on paint with a brush. If you want to take this route, our article on choosing a paint brush will come in handy. It compares high-quality natural bristle brushes to hardware-store varieties. We also offer a guide to caring for your brushes after using them. And if you plan to save some paint for touch-ups, we have a few tips on preserving leftover paint and varnish.
As the years go by, dulled linear polyurethane (LPU) finishes can be revived, but this requires special care. Our article on extending LPU life makes sure you avoid any mis-steps that can lead to premature LPU death.
We’ve recently made open to the public our introduction article to the ongoing test of topside finishes. Presently, only subscribers can review our latest test report on topside paint.
For even more detailed advice on sailboat refinishing, check out Don Casey’s illustrated guide Sailboat Refinishing, which covers everything from choosing the right tools to getting a professional finish at half the cost. The book is available in our online bookstore. And if youre not interested in painting your hull but simply want to bring back its shine, our e-book on gelcoat restoration and maintenance tells you everything you need to know about reviving a worn fiberglass hull.
We’d like to hear about your hands-on experiences during do-it-yourself paint projects. If you have already undertaken a paint project, you can help fellow sailors through this process by posting your comment below or emailing our editorial offices at [email protected].












I recently repainted my trawler yacht using Epifanes mono urethane. The gloss was amazing. I used the roll and tip method. I struggled to get the fine brush marks to lay down and disappear. After conversing with the Canadian rep he informed me they now just recommend rolling, without the tipping off. They now recommend rolling over spraying as well! My final coat was done that way and the results were great. I have used Epiphanes competitor products (Interlux and Petit) with much worse results. In one case I painted a racing sloop 4 separate times and it glossed up only one of the four times. In another case a barrier coat litterally balled up and would not roll on pulling itself off as I rolled. Epifanes for me! You can see my video of the results on a facebook page I manage “Mainship Owners Page”
I am hauling out in a month or so in Mid Florida. Having played with car painting , I was astonished at a video showing someone use a rattle can of Rust-Oleum and then atop that , a rattle can of clear two-part polyurethane. On the bottom of the polyurethane clear is a button one presses to puncture the smaller of the two inside Chambers thereby mixing the two-part polyurethane clear. The results were incredible! Because I am a poor person, that is how I’m going to paint my 30 foot hunter cherubini.
I painted (SOLO) the deck of my boat the first half of August, 2020 in an open boatyard contending with wind, rain, periodic bird droppings, morning dew, and rotating around the boat from the hot sun when possible. Given the environmental challenges I changed my mind from Interlux Perfection to Interlux Brightside. I followed the manufacturers instructions to the letter (I must have called them four times with questions) and very satisfied with the results thus far. I did two coats of both primer and topcoat (roll and tip method) with all the sanding measures recommended. I did not remove (strip) all deck equipment before painting…removal and reinstall would have added another two weeks as the deck of my 42′ cutter is very busy with four hatches, five dorads, numerous blocks, and many other equipment placements. I only painted the smooth parts of the deck, not the nonskid sections. Thus, the massive taping portion of the job took me 1.5 days alone matching the original deck layout. Sanding, vacuuming, and wipe-down between each coat…essentially, one day of prep then one day of painting was the routine. The large open deck/cockpit portions were relatively easy and went quickly but painting around detailed gear made the task more difficult.
It was a job that badly needed to be done and, overall, I am glad it is over and pleased with the job but it was a lot of work working solo.
Our boating co-op which at the time I was fleet captain, had 5 Catalina 27’. We used a two part product by Pacific Endura. Foam rollers with no tipping ended up the best application. One needed a magnifying glass to see some orange peel which we wet sanded most of down to a great finish.
A very tough product needing some practice to get right. The company has excellent help available.
When I painted my Pearson 36, I used Epifanes two component. As I was rolling and tipping, I noticed that some spots due to lack of space were only getting hit with the brush. When I saw how smooth and glossy those spots looked, I decided to to a little test.
I was planning on painting two coats. So the first coat, I painted the starboard topsides, rolling and tipping. I painted the portside, rolling only. I painted the transom with the brush only.
I am not a pro by any means, but the roller only side looked better than the rolled and tipped side and the brush only transom.
Is it the paint? I am planning on painting the boat again due to scratches, but the previous paint job is holding up well and looks great from 10 feet away.
The correct roller material (mohair) makes a huge difference, as well as having the paint at the right temperature, thinned correctly and having a helper move the scaffolding and mix the paint so the applier doesn’t have to stop.
I was going to use the epithhane paint as well. But they recommended a foam roller. Did you try the foam roller or was the mohair better than that
Could you please respond to my email at
[email protected] or text
610 662 1694
Thanks
Marty
I’ve used several two part paints with roll and tip and pretty good results. However, Alexseal with their recently introduced brushing additive is far more forgiving that other paints. I mix it 2:1:1 with converter and reducer then apply it with a mohair mini-roller. Rather than tipping with a second brush (or second person) and go over it lightly with the same roller shortly after if necessary to pop any bubbles. However, there are very few.
In addition, the paint is repairable, meaning that it can be buffed out and blended without later differences in appearance. No matter how good you are, there is gonna be some %$@! bug in the paint, and picking it out after the solvents have flashed off will always leave a defect. Likewise with dust and Maryland oak pollen.
Spraying a two part paint in clean conditions might give you a nearly perfect finish, but the isocyanate mist reaches hazardous levels before you can smell any solvents through an ill-fitting respirator. Thats why the Safety Data Sheet tells you to use an external air setup that few DIY painters will invest in.
I strongly second Jim Kneale’s recommendation for Alexseal. The brushing additive means you can just roll it out with no tipping. It has totally changed the game for DIY painters. I am just finishing up a hull repaint using Alexseal in Pasadena, MD. The most common question I get from fellow boaters and professionals alike is “I assume you sprayed that?”
Another advantage is the ability to apply multiple coats without sanding in between, if applied with 12 hours. At 70+ degrees I’ve been overcoating after 90 minutes.
I have an extensive journal on this project if anyone wants details: https://potomacboatcraft.com/projects/hull/2020-07-01-overview.html