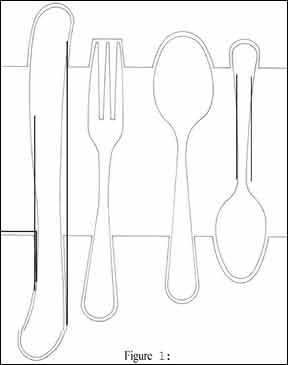
One solution to the problem of tableware stowage is a bulkhead rack of the type commonly available from marine chandleries and discount houses. If you have some free bulkhead space in the galley area such racks can be fine, but, if you’ve got a drawer or cupboard available, stowing your tableware under cover seems a better solution. The problem is that the tableware should be secured within the drawer or cupboard.

288
You could use one of the compartmented, plastic trays such as many of us employ at home, but ideally you want something which holds the tableware against the movement and vibration of the boat.
In Figure I, the tableware is held in simple wood forms custom made for the specific items.
The forms are skeletal in nature, ie, they only hold the tips and tails of the tableware. You could cut the forms to totally surround the tableware, but cleaning would be troublesome.
The forms can be fastened directly to the bottom of a drawer or cupboard, or to a sheet of plywood. If you do the latter, you won’t lose much space, yet cleaning will be easier, and you can move the whole collection about safe and snug, say to the table.
Construction is simple and straightforward, an evening’s work. First make tracings on light card easier to use than paper when you begin to transfer the patterns to wood. Take some care on this step because you want an accurate, symmetrical tracing, and that can be a bit tricky, because knives, forks, and spoons aren’t flat. When satisfied with your tracings, cut them out with scissors.
Next you need to decide on the width and depth of the wood to be used on the forms. For the modest collections of tableware found on most small and medium sized yachts, 2×4 stock will do nicely.
Cut a spacer of the same depth as the forms to support the middle of the patterns. Align the form material and spacer on your bench. Then play with the patterns until you’ve achieved a satisfactory arrangement.
Note that we’ve shown only one knife size, one fork size, and two spoon sizes. If your tableware selection is more extensive, obviously you’ll have a more complex form. In any case, you’re apt to be left with some waste space which can be used for other objects, Be creative. You might find space for wooden cooking spoons, spatulas, salt and pepper shakers, etc.
Once you’re satisfied with the arrangement, mark it and cut it out with a band saw or saber saw. Cut just outside your drawn line, to get a pleasantly snug fit.
Use a rasp and sandpaper to smooth out your cuts. Then temporarily fasten the forms to a 1/4″ base.
Try your tableware in the forms. If necessary, adjust the forms with rasp and sandpaper or by repositioning on the base.
When you’re satisfied, trim the base and permanently fasten the forms to it. Flat head screws countersunk and driven through the base into the forms from behind is a good, simple method of attachment.
Either a varnish or gloss enamel finish is appropriate. A nice finishing touch is to line the shaped forms, and perhaps the base, with green felt. Cut and trim to shape, then attach with contact cement. In addition to looking fine, the felt lining somewhat quiets the tableware. The price of this elegance is eventual mildew, soiling, and the consequent, periodic need to replace the felt.
-J. Pazereskis


