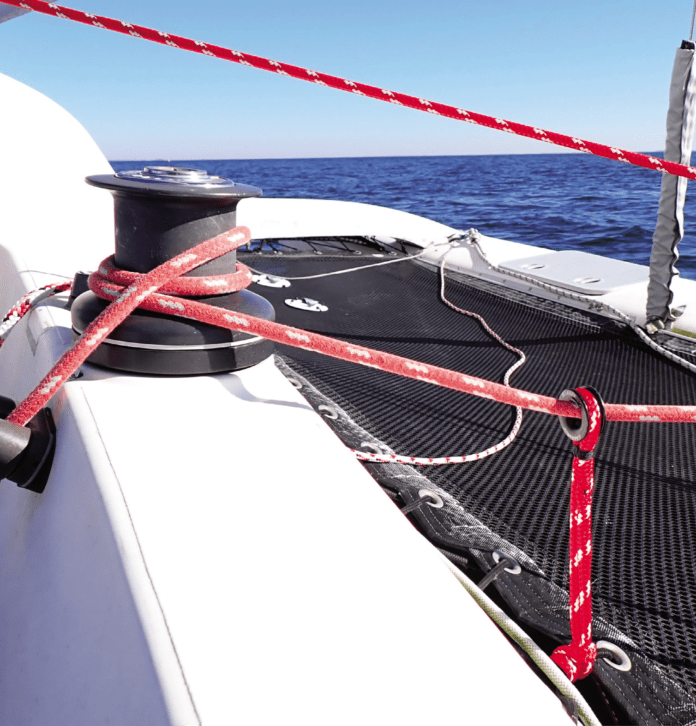
If a line does not approach a cam cleat close to level, the line may slip out or be hard to cleat or release. If a line approaches a winch too low, there is excessive friction, and if too high, the resulting overrides can be simply annoying or hard to release and downright dangerous. A fairlead corrects the angle.
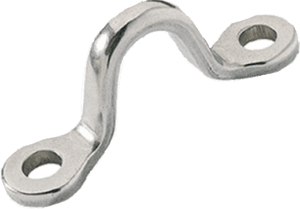
Fairleads range from a simple fixed eye like the Ronstan Narrow Saddle screwed to the deck, or ball bearing genoa car. We have been tweaking the leads on our test boat and thought we would try a few DIY versions of the high-tech Dyneema fairleads we see on racing boats. We wondered if our DIY versions might make sense for budget-conscious cruisers. One obvious appeal of these new fairleads is that they are soft. And some types require no fasteners. A leak-proof fairlead that won’t break a toe? We were intrigued.
We first saw glued-on Dyneema lashing points on dinghies and kayaks, where a few grams saved here and there actually matter. Then they began appearing on racing keelboats, where their massive strength made sense. Lately, we have seen them on the cabin tops of high-end cruising catamarans, where they are used as lashing points for awnings and window covers. For securing deck hardware like blocks and deck gear, a stainless-steel padeye has long been the standard for cruising boats, but we began to see several advantages of Dyneema padeyes for cruising sailors.
PADEYES
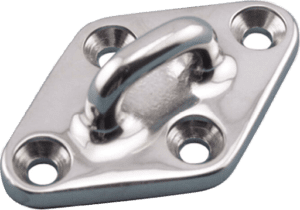
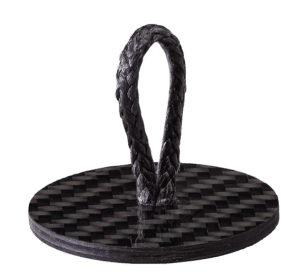
We think of a padeye as a sort of U-bolt secured to the deck with 2-4 bolts. But with Dyneema, it is a single loop inserted through a single hole, and secured by epoxy and splayed fibers (see “Making Your Own Dyneema Padeye”). Sometimes the loop is secured by a stopper knot.
If the padeye is to be glued down, the edges of the hole through the baseplate should be chamfered slightly, smoothed, and coated with epoxy to reduce chafe.
Our testing suggests that as long as these fiber loops are mounted in solid glass or well-backed, they are about 50 percent as strong as the line they are made from. The only downside is that the line will suffer from UV damage and the expected useful life is only about 10 years (unless made sufficiently over strength).
Although off-the-shelf varieties can be expensive, a DIY glue-on loop is relatively cheap to make. These loops are especially useful for securing awnings, or for permanent tie-down points for light gear on decks.
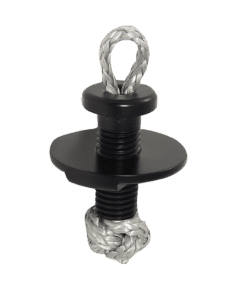
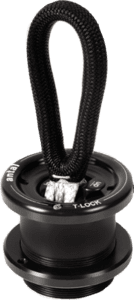
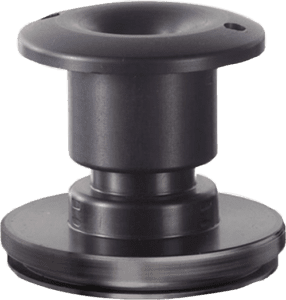
Some manufactured Dyneema padeyes use two components—a through deck fitting and a matching bushing that threads into it. The Colligo CS-31 and Antal T-Lock are examples of this (see adjacent photos). A knot or a toggle secures the Dyneema loop to the bushing. (Any of the common soft-shackle stopper knots will work for this purpose; a diamond knot is the common.) The bushing is then threaded into the through-deck fitting. These through-deck fittings must be well-sealed with bedding compound; some have watertight caps to
prevent water ingress.
CHAFE COVERS
For added UV resistance, you could add a Spectra sleeve over the Dyneema loop. On the DIY padeye, this cover can extend down into the baseplate hole and help capture the Dyneema loops (see photos page 9). You could also use a covered rope like New England Ropes WR2 instead of 12-plait single braid.
STICK-ON PADEYES
Light duty padeyes can easily be made by mounting the loop in the center of a fiberglass disk. Bevel the edges and paint. But the working load will be limited by both the secondary bond to the deck and the bond between the core and the deck skin. Only use these for light duty.
LASHING RINGS TO STANCHIONS
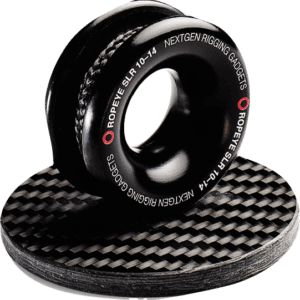
Some fairleads don’t need a padeye. You can simply lash the low friction ring to existing hardware. For example, roller furler line fairleads are commonly attached to stanchions. You can just as easily lash a low friction ring to the stanchion. The lashing requires basic marlinspike skills, but the consequences of misalignment are less than they are on more clamp-on fairleads, which can bend under eccentric loads. A stanchion can also be a good place to lash a floating fairlead.
DECK LEVEL FAIRLEADS
If the fairlead must be right on the deck, you can make a bolt-down fairlead as described in “Making Your Own Dyneema Low-Profile Padeye” sidebar. It wasn’t a lot of work, but there are a lot of off-the-shelf options as well. The two-component through-deck Dyneema fittings using a bushing are ideally suited for this purpose. You could also just drill a hole and secure a Dyneema loop under the deck with a knot—taking care to seal it well, of course.
FLOATING FAIRLEADS
In some cases, the best fairlead location may be floating in space, a few inches or feet above the deck. We considered using a bolt-on fairlead and a cam cleat to manage the inhauler for a new reacher, but noticed two problems. The hardware would take over a favorite helming position on the coaming. And adjusting the line in brisk winds would require the help of a winch.
A floating lead and a nearby winch provided an elegant solution. Instead of bolting on more hardware, we secured a low-friction ring lashed into a loop to the trampoline lacing, just a short distance below the winch. When not in use, this floating lead lies on the tampoline, out of the way. If the tramp lacing, or some other existing hardware had not been conveniently located to attach our new floating lead, then we would have considered adding a Dyneema loop padeye.
STRENGTH
We tested two samples of our DIY Dyneema padeye in shear (see “How We Tested,” page 10). The lighter sample was built from 3/16-inch Amsteel (5,400 pounds minimum breaking strength) and 3/16-inch pre-cast fiberglass, and the heavier sample was built with ¼-inch Amsteel (8,600 pounds minimum breaking strength) and ¼-inch pre-cast fiberglass. Neither showed any sign of strain at the test rig limit of 5,400 pounds (the minimum breaking strength of the climbing carabiner used for the test).
We recommend a working load of no more than 20 percent of the line breaking strength (about 1,080 and 1,720 pounds respectively) to allow for uneven stress distribution among the fibers. The fiberglass should be solid and at least equal in thickness to the Dyneema cord. If the deck is cored, remove an unusually large area of core and fill with fiber reinforced epoxy, and use a bonded fiberglass backing plate. Alternatively, you can use a deck bushing product. These are strong, expensive, and the cord is replaceable.
DECK BUSHING PRODUCTS
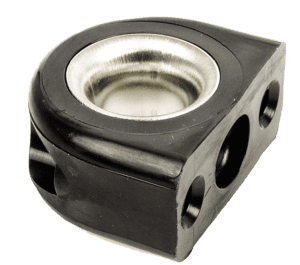
Most race boats have cored decks, and so core sealing is required for all penetrations and reinforcement for any significant load. A bushing will still need to be sealed, but the load is spread by the bushing. Additionally, the Dyneema cord can be replaced, since it is generally secured by a stopper knot on the inside. There will be some sealant around the Dyneema to reduce leaks and hold it in place. These types tend to be expensive, but not more than stainless padeyes of similar load rating. Benefits are less weight and less hardware on deck.
GLUE-ON PRODUCTS
The Ropeye XS and XSS are glued on to the deck with epoxy, so the working load depends upon the secondary bond strength of epoxy, which is greater than 2000 psi on gelcoat. However, the bond between the deck’s outer skin and core is weaker, typically 300-1000 psi. So to avoid pulling the skin away from the core, stick-on padeyes should be limited to a working load of about 100 pounds.
If the deck or attachment point is solid laminate, you can increase the working load to 300-400 pounds. However, if you have no core to worry about sealing, you might as well just drill a hole, splay or knot the end of your Dyneema loop, and have a fitting that is 4-5 times stronger than any stick-on padeye, and easier to replace.
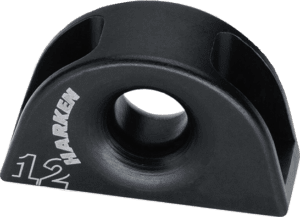
You can also glue a conventional padeye to the deck by first bolting it up to a fiberglass pad. Drill the holes and countersink on the backside of the pad, screw the machine screws up through the fiberglass pad and into the padeye. Put the nuts on the top (acorn nuts give it a clean finish). Glue the whole padeye and fiberglass pad down on the deck. See also “Glue-on Mounts,” PS July 2017.
DURABILITY
Dyneema typically loses about 3-5 percent of its strength per year in tropical sun, with 6-10 years being a practical life expectancy. Chafe will be a factor in padeyes (avoid direct attachment to metal hardware with sharp edges) but not in the low friction ring applications. To replace Dyneema that has been glued in, you’ll need to drill it out.
ADVANTAGES OF ‘SOFT’ PADEYES
Dyneema padeyes offer many advantages. If the loop is a few inches long, the padeye can twist and turn to align with the load, so you rarely need swivels. Soft padeyes won’t stub your toe.
Done properly, a soft padeye can’t leak and it’s doubtful you’ll need to re-bed it during its useful life. What about lashing points, where you would normally add a padeye, but would rather not have something hard to sit on or step on barefoot? Soft padeyes are ideal for securing cockpit cushions—we’ve never had much luck with snaps.
CONCLUSIONS
We’re still learning what Dyneema and low friction rings are good for, not only for racing boats, but also for cruising boats. When I first saw Dyneema padeyes, I worried that UV and chafe would doom them to a short life, but given the strength and durability of Dyneema, this may not be so accurate. Even if weight means little to you, simplicity, durability, and less hardware banging around are all good things.
CONTACTS
ANTAL, www.antal.com
COLLIGO, www.colligomarine.com
HARKEN, www.harken.com
ROPEYE, www.ropeye.com
RONSTAN, www.ronstan.com
SUNCOR, www.suncorstainless.com
WICHARD, www.wichardamerica.com
We liked the 3-D leads we installed for our genoa so much we decided the reacher needed the same treatment. This time we were only interested in inhauling. Because you don’t typically reef a reacher (you roll it up and use the jib), there is no need to adjust the fore-aft lead position.
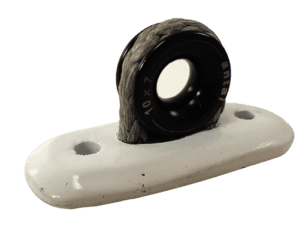
First, we decided to try a cam cleat. Because the inhaul line would rise at a 20-degree angle, we needed a low-profile fairlead, like a typical bolt-on deck fairlead, but we decided to base ours on a low friction ring. We’ve worn through a good many plastic fairleads, and fairleads with stainless liners aren’t particularly low friction and don’t tolerate large angles well. We had low-friction rings left over from an unrelated project, some Dyneema scrap, and fiberglass scrap, so our new fairleads would be practically free. Besides that, we thought they would be fun to make.
LOW FRICTION FAIRLEAD STEP-BY-STEP
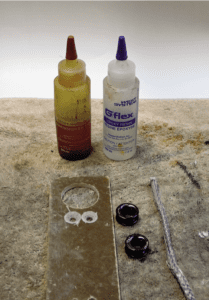
1. Drill two holes about 1/32-inch larger than the Dyneema cord.
2. Countersink from the underside about ¾-inch to provide room for the splayed fibers. A slight chamfer on the top side as well may help with stress distribution and wear, and will also add room for epoxy sealing.
3. Thread the Dyneema through the holes and snug the low-friction ring into the loop.
4. Unlay the Dyneema fibers into the countersunk area.
5. Mix your epoxy for gluing. West System G-Flex epoxy is recommended, because it bonds to the Dyneema rope better than standard epoxies and because it is tough and flexible.
6. Spread the epoxy in the countersink pocket, and splay and press the fibers into it. Apply more adhesive over the fibers, and work it into the fibers, like wetting out fiberglass. If you are doing this is through the deck and not into a fiberglass plate, make certain the fibers penetrating the deck are well wetted out and flood with a surplus of epoxy to make it watertight. Allow the epoxy to thicken.
7. When the epoxy is nearing gel state, tension the loop and press the fibers into the recess.
8. After full cure, sand the bottom smooth.
9. Paint your new padeyes and install them with sealed through-bolts. You can also just glue the rope through the deck if you have access from below deck. We could have glued the rope through the deck and dispensed with the separate mounting plate for our own project, but we didn’t have good access from belowdecks. Made from 5 mm Amsteel, our new padeyes are vastly over strength for our purposes (a maximum of about 150 pounds working load), so we’ll never have to replace them. It’s easy to over-engineer with Dyneema.
THE WEDGE FACTOR
Common sense says that bonding Dyneema with epoxy is unreliable, since it is made from polyethylene, which no adhesive can reliably bond to at high load. But anything that flares out the fibers, like a compression cable fitting on standing rigging, makes it impossible for the Dyneema to pull out without removing a big chunk of fiberglass with it. You are effectively creating an epoxy wedge that prevents the ropes slipping back into the hole.
A stopper knot can also work if all you need is a loop, but there are several reasons gluing is better. First, the epoxy seals the deck penetration, keeping out water. Second, the splayedstrands spread the load across the fiberglass. And finally, the splayed strands can be very low-profile if a small recess is provided. Most of the splayed strands can be sanded away, so long as the line and epoxy wedge under the hole remains intact.


To make our do-it-yourself Dyneema padeye, we splayed the fibers and bonded them to fiberglass laminate (see page 8) using thickened epoxy. Since polyethylene fibers are notoriously difficult to bond, we expected our DIY padeye would not support the same high loads of factory-made Dyneema padeyes.
However, because the epoxy creates a wedge that fills the voids, it still prevents the Dyneema from pulling out. In the accompanying images, our DIY 3/16-inch Dyneema sample is being tested to 5,400 pounds of load. Assuming a 5:1 safety factor, the
padeye would be good for working loads up to about 1,000 pounds.
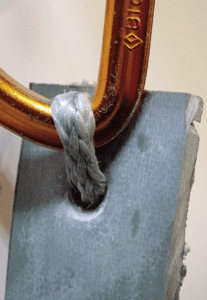
1. Despite crimping caused by low-radius turn around the carabiner on our dynanometer, the 3/16 Dyneema showed no signs of failure under 5,400 pounds of load.
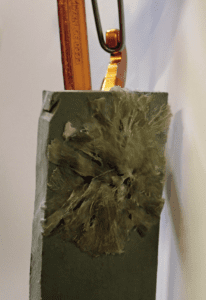
2. The fibers on the bottom of our DIY fiber padeye didn’t budge. Like zinc used in poured-socket rigging terminals, the epoxy creates a wedge that holds the fibers in place.
VALUE GUIDE: PADEYES FOR DECK TIE-DOWNS OR RUNNING RIGGING
| MANUFACTURER | MODEL | SIZE RANGE | FIBER SIZE | NUMBER OF HOLES | SIZE OF HOLES | WORKING LOAD | PRICE |
|---|---|---|---|---|---|---|---|
| FIBER | |||||||
| ROPEYE | Stick-on | XS and XSS | 3 mm | 0 | None | 220 lbs. | $22 |
| ROPEYE | Loop | 8-14 mm | 5-8 mm | 1 | 12-18 mm | 900-2,200 lbs. | $107 |
| ROPEYE | TDP (through-deck) | 8-18 mm | 5-8 mm | 1 | 12-18 mm | 2,420 max. | $54 |
| COLLIGO | Soft padeye CSS-31 | 10 mm | 7 mm | 1 | 19 mm | 2,500 lbs. | $71 |
| ANTAL T-LOCK | TL22 | 10 mm | 5 mm | 1 | 44 mm | 7,716 lbs. | $161 |
| WICHARD | Tye-Tec | 10 mm | 7 mm | 1 | 20 mm | 4,200 lbs. | $136 |
| STAINLESS STEEL | |||||||
| HARKEN | Diamond base | 19 mm ID | user supplies | 4 | 6 mm | 3,500 lbs. | $28 |
| RONSTAN | Narrow Saddle | 16 mm ID | user supplies | 4 | 5 mm | Not stated. | $6 |
| DIY | |||||||
| DIY PADEYE | DIY Padeye | XS | 5 mm Dyneema and 3/16" fiberglass | 1 | 8 mm | 1,100 lbs. | $3 |
| DIY PADEYE | DIY Padeye | S | 6 mm Dyneema and 1/4" fiberglass | 1 | 10 mm | 1,700 lbs. | $4 |
fairleads.xlsx
| MAKER | MODEL | FAIRLEAD | FIBER LOOP SIZE | NUMBER OF HOLES | SIZE OF HOLES | INSERT TYPE | WORKING LOAD | PRICE |
|---|---|---|---|---|---|---|---|---|
| FIBER | ||||||||
| ROPEYE | Stick-on | 10-14 mm | 3 mm | None | NA | Low friction ring (LFR) | 50-75 lbs. | $70 |
| ROPEYE | Pro | 10-14 mm | 5-8 mm | 1 | 16 mm | LFR | Not given | $142 |
| ROPEYE * | Pushing | 12 mm | 5-8 mm | 1 | 18 mm | LFR | 2,420 lbs. | $54 |
| COLLIGO * | CSS-31 | 10 mm | 7 mm | 1 | 19 mm | LFR | 2,500 lbs. | $71 |
| ANTAL T-LOCK * | TL22 | 10 mm | 5 mm | 1 | 44 mm | LFR | 7,716 lbs. | $161 |
| WICHARD * | Tye-Tec DL10ALL | 10 mm | 7 mm | 1 | 20 mm | LFR | 2,000 lbs. | $136 |
| STAINLESS STEEL | ||||||||
| RONSTAN | Bullseye | 16 mm ID | 4-10 mm | 2 | 5 mm | Nylon & | Not given | $7 |
| HARKEN | Bolt-down | 16 mm ID | 4-10 mm | 2 | 6 mm | LFR | 2,000 lbs. | $38 |
| DIY | ||||||||
| DIY | Flush mount | 10 mm | 5 mm | 2 | 5 mm | LFR | 1,100 lbs. | $16 |
| DIY | Flush mount | 10 mm | 6 mm | 2 | 6 mm | LFR | 1,700 lbs. | $20 |
| DIY | On sling | 16 mm | 5 mm | 0 | NA | LFR | 1,100 lbs. | $17 |


