to Tie Your Boat to a Dock")


Compared to the streamlined operations found on chart plotters, some of the navigation features on apps that we tested were clunky, requiring several steps to carry out basic function. But it becomes easier as you gain familiarity with all the functions.
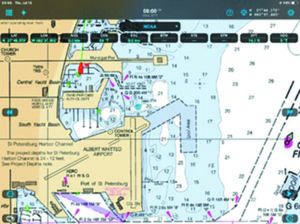
- Using Weather 4D, to “go to” a location, one launches the application and then taps the icon on the lower left corner to unlock the screen, thereby allowing the user to pan or move the display area (see red arrows). One then moves the screen to find the destination. Then instead of simply tapping on the screen to select a location, one must tap on the crosshairs in upper right of the screen, this will bring down a drop-down menu that allows various options for the selecting tool. For simplicity, I selected “Center of Screen.” Once the desired destination is under the crosshairs in the center of the screen, one then taps on the rose in the upper left to open one of the two “Navigation” options in the program. This brings another drop down menu, on this menu one selects “Go to target.” In fairness, if you do not change any of the options selected, one can simple center the screen on the next destination, click on the upper right and select a new “Go to.”
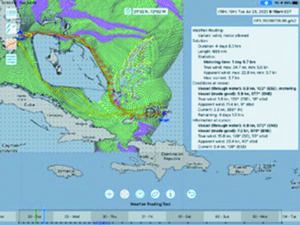
- This is where Luck Grib app sets itself apart from any other product. The user can add boundaries. These boundaries are treated as no-go zones by the routing software. I set boundaries around the shallow areas in the Bahamas. Once these boundaries were set, the program routes appropriately. The value of this feature cannot be overstated. .
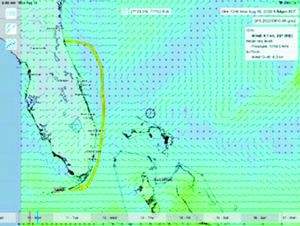
- By closing the weather routing view on Luck Grib, the suggested route was easier to distinguish. This image, sprinkled with wind barbs gives a good view of the planned route. This view clearly shows that swinging east around Cape Canaveral is faster than
following the rhumb line for the given current and wind conditions.