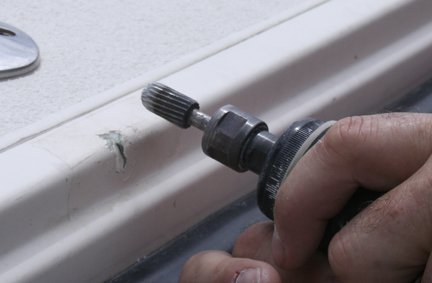
Eventually every owner of a fiberglass boat will have to deal with gelcoat cracks and chips. Fixing these minor blemishes are well within reach of the competent do-it-yourselfer, but to make a nearly invisible repair takes a bit of practice. Achieving the same level of gelcoat gloss, adhesion, and color of the original hull or deck is a kind of black art, and it is a field full of pretenders. You could run a weekend movie marathon featuring all of the YouTube DIY videos offering bad advice on gelcoat repairs.
Many boat owners simply throw up their hands and opt to paint the hull with a one-part or two-part paint, a project weve examined in great detail-from prep work to paint selection to refinishing tips-in our multi-part series on linear polyurethane (LPU) marine paints. If you have deeper gouges to repair before either project-painting or gelcoat- then our tips on using pre-thickened epoxy fillers will be helpful. For a more detailed look at choosing and using these products, subscribers can also review our test reports on pre-thickened epoxy fillers, and mix-it-yourself fillers and fairing compounds.
In an upcoming series of articles well be looking at the art of gelcoat repairs-everything from color-matching to filling to spraying. Well also be looking at the various gelcoat repair products.
I recently got the chance to speak with Paul Lacharite of Mini-craft of Florida on the topic of gelcoat repair. Lacharite has been manufacturing gelcoat since 1976, and in 1980, he became interested in mastering the art of matching colors, helping to develop a system that enables repairers to quickly match the original color of almost every boat that ever hit the U.S. market. He now runs a series of professional workshops from October to March every year at the Mini-craft facility in Wildwood, Fla.
Over the years, Mini-craft has assembled an inventory of sample panels of the gelcoats used by most major watercraft built in America. Using these panels and some basic information from the boats manufacturer, they can match the gelcoat of virtually any boat over the phone. Since gelcoat-especially colored gelcoat-weathers over the years, achieving an exact match often still requires some onsite color-matching skill, but if a 6-foot finish (a repair or refinish job that is undetectable from more than 6 feet away) is all you want, Mini-crafts in-house blend will be a pretty close match.
Mini-crafts products and tools are geared to the professional, but they sell directly to the consumer as well. Unlike other gelcoat suppliers, they don’t just can and label gelcoat made elsewhere, they make it themselves at their Wildwood facility. They offer different grades of gelcoat, and all the equipment you would need to carry out repairs. However, given the challenges of many gelcoat projects, Lacharite reluctantly sells to the average Joe.
People don’t want to follow instructions , he explained. Its human nature. And then, when something goes wrong, its never their fault. Its the product.
One of the most common errors Lacharite sees happens when a do-it-yourselfer or pro wants to spray apply gelcoat to a small area after a repair. For small repairs like this, we use a Preval sprayer, a process I outlined in my previous blog post on gelcoat repair. As it turned out, my own advice in the blog post, based on instruction from a local boatbuilder whod made hundreds of such repairs, was a victim to this cycle of misinformation. (It has since been amended.)
People are always advising to use acetone to thin the gelcoat, Lacharitesaid. This is wrong for many reasons. In summary, he explained, if you use acetone to thin the gelcoat for spraying, you will shorten its life, and get a duller, rougher finish. Styrene is no better, he said; it will cause the gelcoat to yellow. What you want is a properly formulated reducer, something that Mini-craft supplies with its repair kit.
Until recently, Mini-Craft used to sell a handy aerosol gelcoat repair kit, but Lacharite said it became too expensive to produce. The company now offers a similar kit using the Preval sprayer, but its geared toward bigger projects with multiple repairs, so the price is pretty high (starting at $275).
Look for our update on gelcoat repair early next year, and if you have some repair products or techniques to share, comment below or drop me a line at practicalsailor@belvoirpubs.com.


