What do you do when the pin in the leg of your folding cabin table digs up the cabin sole? What do you do about the groove in the top of the teak toerail caused by your dock lines? What about the scuffs in the varnished bulkhead behind the companionway ladder?
The answer is that you make chafe plates to solve all three problems.
288
While chafe plates can be made out of almost any material — sheet PVC, thin stainless steel, aluminum — the most readily available and easily worked stuff is plain old brass.
Brass can be purchased in many forms: sheet, solid round bar, pipe, tubing, and half oval, for example. It is quite cheap. If you have a local scrap metals dealer, you can buy enough scrap brass in various forms for $10 or less to keep you busy with a lifetime of projects. If there’s no metal dealer at hand, most hobby shops carry substantial supplies of brass, although hobby shop brass tends to be thinner than what you want for most jobs.
The workability of brass sets it apart from harder materials such as silicon bronze and stainless steel. Brass is easily cut with a saber saw using a fine-tooth blade, or with a hacksaw. Rough edges can be filed smooth, or evened up with aluminum oxide sandpaper and a sanding block, or a sanding disc fitted in a table saw. It drills easily, and takes a nice polish.
The most common forms of brass, and some uses for those forms, include:
– sheet, 1/16″ or less in thickness, used for large chafe plates;
– flat bar, thicker than sheet, used for escutcheon plates and fiddle holders:
– pipe, used for bushings or sleeve bearings;
– tubing, which makes drains and receptacles for fiddle pins;
– angle, which can be sawn in short pieces to make shelf support brackets;
– half-oval bar, for capping toe rails or rubbing strakes.
Because it contains a high percentage of zinc, brass should not be used underwater. In addition, brass is not particularly strong, and should not be used for heavy structural applications.
Only silicon bronze fastenings should be used with brass. While bronze screws and bolts may not be available at the local hardware store, they are pretty readily available from mail order chandlers and boatyards.
288
Wherever brass — or any other metal, for that matter — is attached directly to wood, the mating surface between metal and wood should be filled with a bedding compound. If you ever plan on removing the metal — to refinish, for example — use an organic bedding compound such as Dolfinite rather than an adhesive compound, for instance polysulfide or polyurethane, such as Lifecaulk or 3M 5200.
Material less than 1/8″ thick should be fastened with round head screws or bolts. There simply isn’t enough material to try to countersink for flat head or oval head fastenings. A countersunk fastening looks better in thicker material. Oval heads look best, but should not be used if the material is under foot (even the slight projection of the head could trip someone) or will be leaned against (screw heads make rather unattractive welts on your skin).
Brass is soft enough to be countersunk with combination bits with counter-bores, such as those made by Fuller Tool. It is likely that you will have to re-sharpen the counter-bores after putting a dozen or more countersinks into brass.
If you’re unfamiliar with metal work, try a few minor projects to get the feel of the material. In many ways it’s easier than working with wood — small pieces of metal don’t usually split like wood when drilled, for example — but there are some different rules,
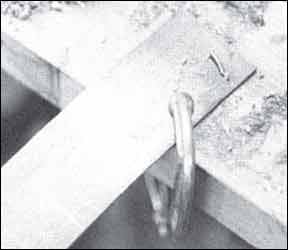
Metal should always be clamped when sawing or drilling. Nothing can make mincemeat of your hands faster than a thin piece of brass sheet which starts to spin in your hand if a drill bit hangs up while you’re punching holes. If you don’t have a bench vise, use a C-clamp or even a pair of locking pliers (Visegrips) to hold the metal to a workbench. When sawing very thin material, it may be necessary to clamp the stock to a thin piece of wood, sawing both wood and metal to keep from bending the metal.
The same goes for drilling holes through brass half oval. Unless the half oval is supported while drilling, there’s a good chance you’ll break it. If it bends, it will almost always break when you try to straighten it. If you’ve got long pieces of brass half oval to move, tape or screw them to a peice of wood furring or a 2×4 to keep the brass from kinking.
288
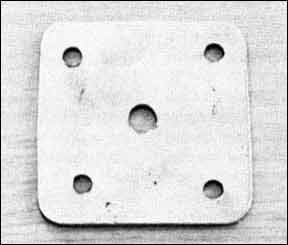
One of the simplest projects to begin on is a brass escutcheon plate for the leg of a folding cabin table. To hold the leg in position when the table is in use, most builders insert a metal pin in the bottom of the leg. The pin fits in a hole in the cabin sole, so an accidental jar won’t knock the table down,
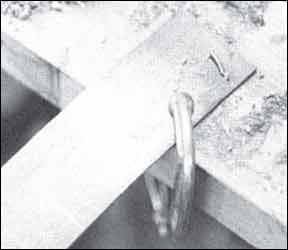
After a while, the cabin sole can get pretty scarred up from trying to get the pin in the hole. This can be avoided or disguised by attaching a brass plate to the cabin sole, with a hole drilled through to receive the pin on the bottom of the leg.
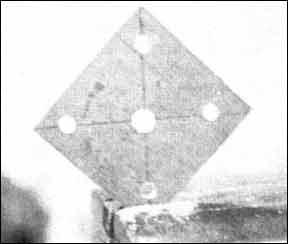
The material should be brass sheet, about 1116″ thick. Saw out a piece about 1 square. Drill a hole in the center just a little larger than the metal pin in the bottom of the table leg. Drill either two or four holes near the edge of the plate for hold down screws. After drilling all holes, dress the edges of the plate smooth with a file. The file can also be used to round the corners of the plate slightly for a more finished look.
After all the filing and drilling are finished, go over the piece, particularly the edges and the holes, with fine sandpaper to remove any burrs and any steel filings, which will inevitably leave rust marks sooner or later.
If you have a bench grinder for sharpening tools, you can buy a cloth polishing head at a hardware store to replace one of the grinding wheels. This turns your bench grinder into a polisher/buffer for putting a high gloss on metal parts. A few sticks of polishing compound finishes off your metalworking kit.
Be extremely careful polishing small parts. If you press too hard against the polishing wheel, or orient the material incorrectly relative to the wheel, the piece can be grabbed by the wheel and can ‘give you a nasty cut.
When cutting, drilling, or polishing metal, always remember to wear safety glasses. A flying chip of metal can blind you instantly.
The finished, polished escutcheon plate is simply screwed to the cabin sole.
Ideally, this type of plate would be made of stock thick enough to countersink for flat head screws. Then, it would be mortised flush with the cabin sole so that there is no projection to stub toes. In practice, this may not be necessary. Try it on the surface first, recess if necessary.
The same basic technique can be used for a variety of simple metalwork in brass or aluminum. Bronze is slightly harder to work, Stainless steel is very difficult to work with because of its hardness, and it must be thoroughly polished wherever it is cut or drilled to prevent surface rust.
You can get completely professional results with very little practice. The only problem is that your friends may never notice. If you do it right, it will look like it has always been there. And that’s the way it should look.


