Having two different locations for attaching the tillerpilot to the tiller can be a practical alternative for smaller boats that won’t produce loads that approach the unit’s maximum thrust. When attached to the point that is closer to the rudder stock, the rudder turns faster and has a greater range of movement that is useful for autotacking, as well as for maintaining a steady course in challenging conditions.
Images 1-3 above illustrate the tiller-pilot’s position at various helm positions with the tillerpilot drive unit mounted in a socket 21 inches forward of the rudder post (instead of the prescribed 18 inches), and the tiller-pin mounted 14 inches from the rudder post (instead of the prescribed 18 inches). In order to keep the tillerpilot centered, a short length of fuel hose was added to the drive shaft.
1. With the tiller nearly amidship, the tillerpilot is angled slightly aft.
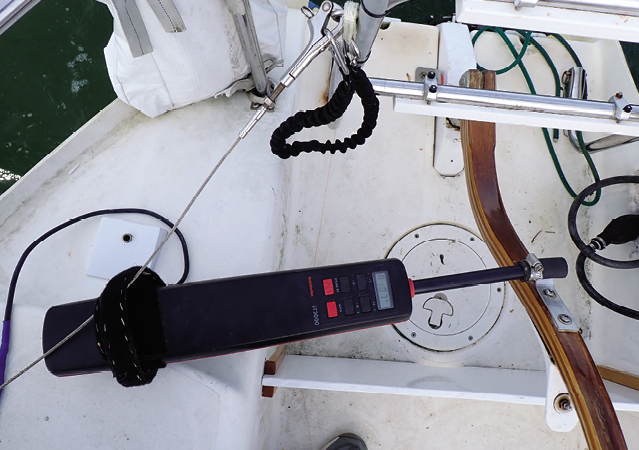
2. With the tillerpilot hard to port at its maximum extension, we’re able to achieve a rudder angle of 22 degrees, sufficient to use the auto-tack function in challenging conditions. Note that the tillerpilot is nearly perpendicular to the tiller, so the maximum force can be applied.
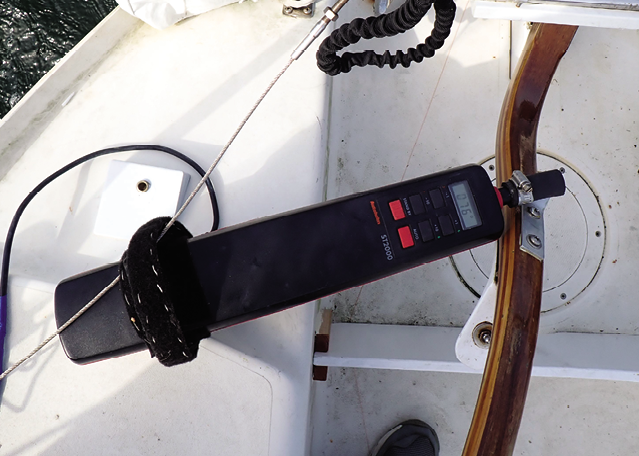
3. With the tiller hard to starboard, the sharp angle limits the force that the tillerpilot can apply, but it is still more than sufficient for our Corsair F-24, even in challenging downwind steering conditions.
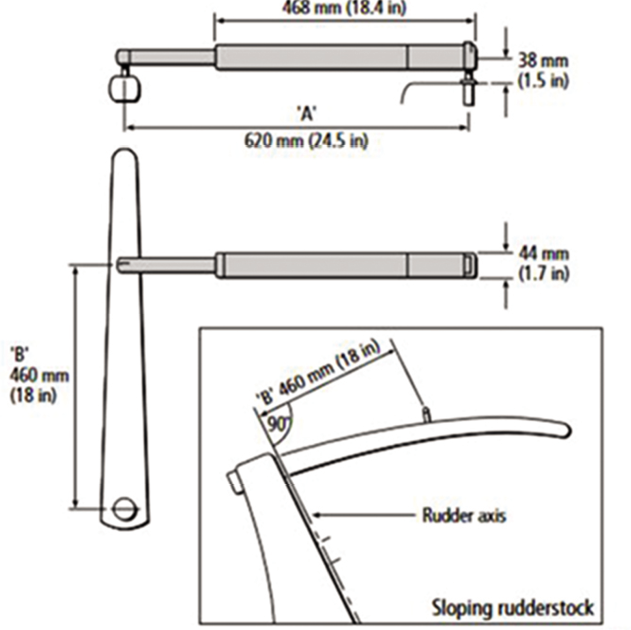
4. Raymarine’s owner’s manual specifies measurements A and B, which we refer to throughout the adjacent articles.
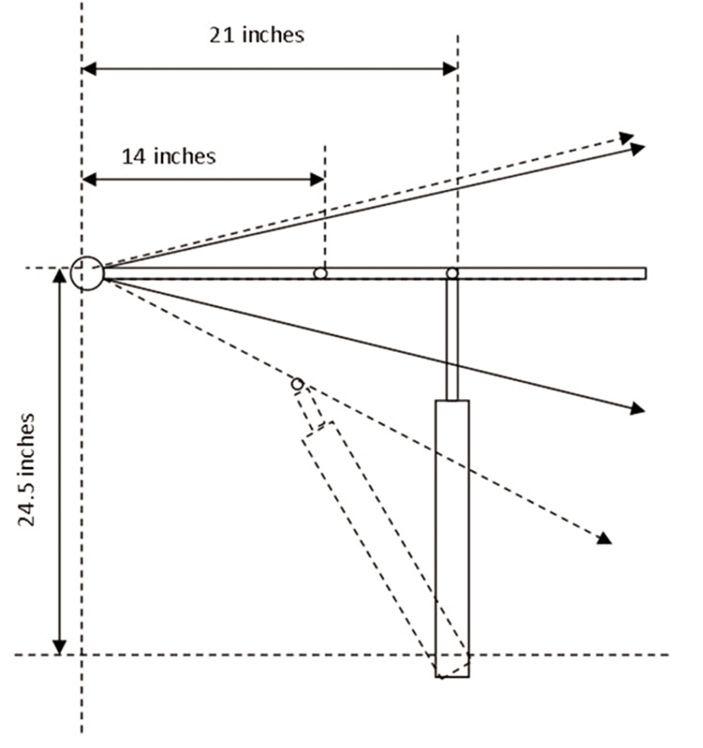
5. On our test boat, the original installer had mounted the tillerpilot 21 inches forward of the rudder post instead of the prescribed 18 inches. To better center the tillerpilot we added a short length of hose to the push-rod (see photos). The extension allowed for more range of motion when fitted to the 14-inch pin location, but force was still diminished when the tiller was hard to starboard.


