
PAEAN TO A NESTING DINGHY
Your recent Inside Practical Sailor blog post “The Great Dinghy Debate” about hard versus inflatables interested me and I thought I would share my thoughts and experiences. I’ve had both versions during my 50 years or so of sailing, mostly on Florida’s west coast. I built my first plywood dinghy about 40 years ago after being disgusted with the bathtub-like rowing qualities of a fiberglass dink. It was a pleasure to build and rowed slightly better that the earlier fiberglass tub, but it was too big to store on the Catalina 25 I sailed at the time and did not tow very well. It ended up on my backyard burn pile after I neglected the varnish over the epoxy, and I switched to inflatables for a dozen or so years.
A used Avon inflatable saw service for about five years, and then I purchased a new Aqua Dutch 8-footer. Neither inflatable rowed worth a damn, but did fine with a 2 horsepower outboard.
What I did not know about inflatables is that they come in either Hypalon or PVC and, not understanding the difference, I purchased the PVC model. The glued seams gave out after only five years with only light use, one two-week cruise in the spring and half a dozen smaller trips each year.
By then I owned a Cape Dory 28, now owned by trans-Atlantic YouTuber Sam Holmes. I started looking at building my own again and settled on a design by John Danicic of Minnesota after seeing his article in Good Old Boat. It was a 9-foot nesting dink made of cedar strips. It took about 400 hours over three months to build and cost about $1,100 in materials. It was very satisfying to build and I had a work of art that got compliments at every anchorage. It towed well with a tapered bow and small skeg, rowed like a dream and scooted at hull speed with the 2 hp outboard. I could stow each 40-pound half nested hull on the bow of my Cape Dory.
Alas, the Cape Dory is gone as I’m approaching 70, and was weary of the maintenance. I now sail a CD Typhoon on Crystal River. The nesting dink gathers dust in my garage but I still put on a coat of varnish each year and row it down my canal to the admiring glances of my neighbors.
Kevin Mulligan
Cape Dory Typhoon
Crystal River, FL
WHAT’S UNDER YOUR FURLER?
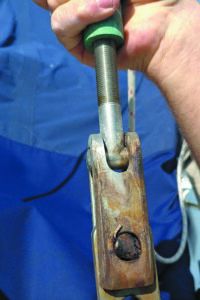
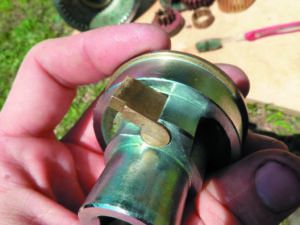
Thought I’d send you photo of clevis pin failure in the making on forestay. This was hidden inside Schafer roller furler and was discovered when standing rigging and furler were replaced. The boat is Catalina 350 from 2004, and the rigging I gather was never replaced. Rigging was fully replaced in 2018 and still can’t believe how lucky I was.
Alun Goss
Uddevalla, Sweden
Because inspecting beneath the furler adds expense and effort, it is often skipped during a rig inspection. Normally, the condition of the boat’s other rigging offers clues to the condition of the headstay. However, there’s always the chance that an unscrupulous seller replaced only the visible shrouds, deciding it was too much trouble to change the headstay. When in doubt, new buyers should consult a rigger regarding the need for inspecting this vital connection.
THE DINGHY-GO-ROUND
Just getting started in cruising, we bought our 1986 Morgan / Catalina 43 in January of this year in Tampa, FL. It came with a very beat up Livingston 10-foot dinghy and no davits to lift it with.
Fast forward to the Morgan refit. We hauled her out for a bottom job and hull side paint. While fixing up the Morgan, we used leftover supplies to fix up our dinghy. With that, we christened her Sloppy Seconds. Fast forward again to launching the mother ship, now named Ami Vos. We slung Sloppy Seconds under our newly installed Atlantic Arch davits and set off.
A week later, hurricane Elsa was bearing down on southwest Florida, and we were in Port Charlotte, FL. Ok, time to get that heavy beast up on deck to lash her down as we prep for the storm . . . ehhhh, nope. Not gonna happen. She was just too damn heavy and unwieldy. We lashed her down in-place the best we could.
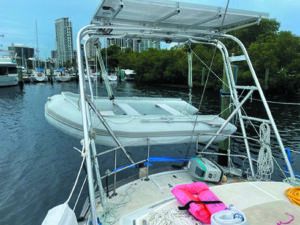
Fortunately, Elsa swung wide and it was a wet and windy evening, but no biggie. We never even got the chance to use the dinghy and decided to sell her and get a RIB. We simply couldn’t manhandle our now beautiful Livingston.
After a ton of research, we settled on a new RIB from Pelican Bay Runabouts in Wisconsin. Their boat compares to the popular Highfield 310 aluminum hulled RIB with hypalon tubes. At $2,850 shipped to my marina, we couldn’t pass it up.
Unfortunately, my wife and I both got the Delta variant of COVID just after it arrived. We are still recovering from the illness and only recently inflated the Pelican Bay and hung it on the davits. We haven’t added the state numbers yet, let alone taken it out for a ride. It’ll happen soon, as we increase our stamina daily.
Thanks,
Nathan & Ana Van Meter
SV Ami Vos, Morgan 43
Glad to hear you are on the mend. We’ll see if we can sea trial the Pelican Bay. We’ve tested only a few aluminum-hull RIBs, which are far more uncommon than molded FRP.
PROS AND CONS OF WALKER BAY
You asked for feed back on dinghies. We cruise the inner south coast of British Columbia in our J105 sailboat. We have been doing so for the last 25 years and have cruised with a variety of dinghies including kayaks, soft bottom inflatables and RIBs. We always tow these items behind us. Last year we purchased a Walker Bay 8. We bought just the basic boat no extras. My comments are as follows:
Pros
• Very light
• Tows very easily – I never felt it when tacking or gybing never swamped even when sailing in 4-6 feet seas, upwind and downwind. At one point we hit 10+ knots of boat speed for 20 minutes or so, and the dinghy had no problem. The interior of the dinghy stayed dry.
• Rows very easily with one person. It was a bit more work with two on board, but still rowed well.
Cons
• Limited capacity
• It’s difficult to trim fore/aft with two people on board.
• More tippy than an RIB.
All in all, it served us well.
Wes Herdman
J105
Ladysmith, BC
WEIGHING C02 CYLINDER?
I noticed your recent blog post, “Check the Expiration Date on Inflatable PFDs” made no mention of checking the CO2 cylinder. Removing from the inflator assembly and visually checking the seal is good, but the better method is to weigh it on a food or postal scale. Most cylinders have a full weight spec stamped on them; if it’s underweight it should be replaced
Tim Hohmann
If the cartridge’s stamped weight and your gram scale are both accurate, this could help confirm that a CO2 cylinder used for auto-inflation of your life vest is still good. Most often, the usual indicators of the need for replacement—punctured seals (indicating prior use), corrosion, chips, or dents—turn up in a visual inspection. We reviewed several owner’s manuals and none mentioned weighing the cylinders. Also, we would still discard a questionable cartridge regardless of its weight. As our July 2019 report “Rethinking the Use of Inflatable PFDs,” explains, if you have the chance to pull manual inflation cord as you go overboard, you should. This will give you more time to access and use the oral inflation tube if auto-inflation fails.
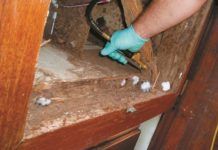
Fall is sailing season for snowbirds who migrate south to spend the winter on their boats, and those early weeks can be overwhelming as you try to catch up on projects from the previous season. Whether you want to be first in the water or are happy to keep tinkering for a few more weeks, the PS Online archives have got you covered.
WOOD FINISH
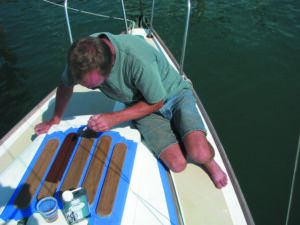
Modern polymers have made the job of protecting wood easier, but we’ve also found some tried and true tung oil products that do well. Search “wood finishes” with our online tool for a bucket-load of articles on products and application tips. Our most recent test report (PS August 2021), and the application and gloss report (June 2015) provide comprehensive coverage and links to previous reports.
RIG INSPECTION
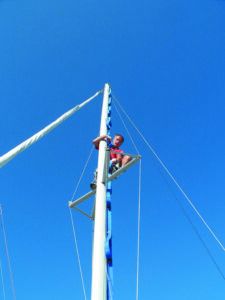
Winter’s freeze and thaw cycles can creep into rigging terminals, and hidden corrosion can leave your rig vulnerable. If you’ve not yet stepped your mast, inspection is easier. If you have stepped it, it’s time to climb. In any case, we have you covered. Search “rig inspection” at PS Online. The late Brion Toss’s “Hidden Causes of Rig Failure,” is a great start.
CLEANING
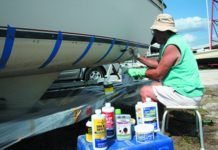
Still scrubbing? Check out our test reports on boat soaps (PS January 2013), waterline stain removers (PS April 2014 and November 2007), isinglass/ clear-vinyl cleaners and protectors (PS May 2014 and March 2009), and hull waxes and polishes (Inside Practical Sailor blog and July 2014 PS issue). Our four volume report on Marine Cleaners in the PS Online bookstore will ensure you’ve got everything you need (www.practical-sailor.com/products).
GEAR CHECK
We’ve got dozens of reports on routine inspections and maintenance ranging from winches and windlasses to chainplates and keelbolts. Of particular interest is our groundbreaking research into lubricants and greases. Our report on winch grease (PS February 2017), spray protectants (September 2007) and anti-seize coatings (August 2018) are a good place to start.






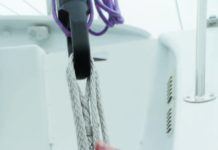


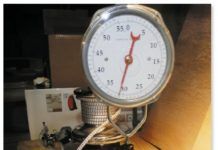













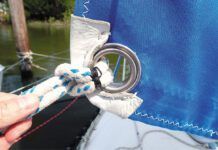



Re Testing The DIY Dog Bone Shackle, Oct 2021
A great article that would probably provide a suitable and safe solution for most sailing activities except anything that might be used in life-saving or “man-riding” – sorry for the gender use but it is a legal term for things that support people.
The catalogue tensile strength of a material requires some adjustment for the intended mode of failure, be it tensile, compression, or shear and they deserve a Factor of Safety and codes such as ASTM often require you adjust the tabulated values accordingly, and most importantly, Size Matters…all of the calculations require the area under stress to be part of the solution. Remember Area is proportional to radius squared!
The failure mode in the dog bones is a bit complex, but will most likely be in shear, which of the three modes is the most important as it requires a significant reduction (x 0.6) of the tabulated value. When you add a reasonable FOS, such as 1.3, you can see how that will really change the answer.
Without doing any math, the recommend dog bone diameter to be 1.25 to 1.5 the line diameter is a great start, but the photos shown on pages 22 and 23 all show a reduction in diameter. (2 of the 3 photos appear to be hollow, which is even more problematic!)
I would suggest the recommendation be reworded to the ultimate finished minimum diameter of a solid dog bone be 1.25 to 1.5 the line size.
If it involves a human, I would recommend doing the math.
Greg Cotten
USCG Master
Hunter 456 Passage