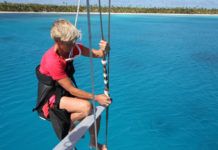
Many PS readers undoubtedly found our articles on going aloft alone (July 1, 1998 and August 15, 1998) a little esoteric, but for the cruising sailor, an alternative means of getting at least part way up the mast is imperative.
Imagine this scenario. You have to thread your way through a maze of seemingly interlocking coral reefs to get to a good anchorage, or to get out of one. From the bow of Calypso, your eye is just over 3 meters off the water, not quite high enough to really see things clearly. Ahead of you, all you see is bottom-threatening light brown coral interspersed with dark blue bands of deep, safe water.
From the lower spreaders, however, the pattern becomes clear: Straight ahead for 50 meters, then a 90 port turn for another 50, then a gradual curve to starboard with a little chicane to clear a lone coral head that may be a little too close to the surface. Raising your height of eye to about 8 meters makes the difference between a nerve-wracking trip down a possible dead end and a piece of cake. A maze, seen from above, is nothing more than a garden of neatly trimmed hedges with a path between them.
We have only faced this scenario a few times thus far. The east exit from the Tobago Cays is a classic Caribbean route requiring good eyeball navigation, as are some of the anchorages in the Roques and Aves off the coast of Venezuela.
Now, however, were headed towards the real stuff. The reef-studded, unmarked inner passages of the San Blas Islands off Panama will be our warm-up for the real challenge-the South Pacific.
With this in mind, we decided to add mast steps up to our lower spreaders.
You will find almost as many ideas on proper mast steps among cruising sailors as you will find preferences in rum. The shape of your foot, the way you grasp things, the length of your legs-all these combine to produce a unique comfort level for climbing the mast without the aid of a bosuns chair.
Many cruising boats-the majority of those that have mast steps-run them all the way to the top of the mast, as an alternative means of going all the way up to do maintenance or retrieve a lost halyard. For us, the idea was to put steps up high enough to reach the perch of the lower spreaders-a good vantage point for eyeball navigation. We keep at least three masthead halyards rove at all times, so the chances of not having an available halyard to get aloft are slim. A quick route to the lower spreaders, however, is another thing entirely.
Few owners take the time to rig ratlines, the traditional way of going aloft, but they are probably the simplest and safest way of all to get a few more feet of height off the deck. Mast steps, however, are more permanent, and may offer a little more apparent security for some.
We chose Pace-Edwards trapezoidal extruded and formed aluminum steps as our fixed mast steps. I did not want to bother with inserting demountable steps every time I needed to scramble up a few feet, and we had a friend who suffered a serious fall from a mast a few years ago when his foot accidentally caught under a folding step and he lost his balance. Fixed steps, to me, offer a little more security.
In our July tests, PS found that the relatively wide rungs of the Pace-Edwards steps might be uncomfortable for some peoples hands. In our installation, you actually tend to grab the narrower vertical portions of the steps with your hands, rather than the rungs. This, of course, is to some extent determined by the spacing of the steps, your arm length, and where your hands tend to naturally grab when you reach.
The Pace-Edwards steps have four 1/4″ mounting holes. Because we do not carry a rivet tool, we had to drill and tap the mast for 1/4″ stainless steel machine screws. The nine fixed steps to our lower spreaders required drilling and tapping 36 holes, a tedious process when hanging in the bosuns chair, and one which littered our teak decks with sharp, oily bits of aluminum swarf. This did not endear me to Maryann, who prides herself on keeping a pristine boat.
To keep the stainless machine screws from seizing in the mast, we coated the threads with Duralac, a zinc chromate paste recommended to us by Hall Rigging for just this purpose.
Fixed steps were not practical for the lowest 7′ of the mast, as the mast-mounted halyard winches, halyard exit boxes, and mainsail cover render the bottom of the mast a junkyard of obstacles. For this section, we installed ABI folding cast aluminum steps, placed among the other hardware as carefully as possible so that you use a combination of the folding steps and the winch drums as footholds and handholds when starting aloft. (Ed. note: Too bad Nick hadnt read Gear Graveyard on page 23 of this issue!)
The ABI steps have four countersunk mounting holes requiring 1/4″ flat-head or oval-head machine screws. This is overkill. Unlike the Pace-Edwards steps, whose design requires four fastenings for rigidity, the ABI steps could easily get by on three fastenings. Of course, theres nothing stopping you from only using three of the four holes when installing them.
We were disappointed in the finish quality of the ABI steps. The visible surface is nicely polished before the steps are anodized. The backs, however-the part that must fit against the mast-are pretty much left with the rough finish typical of sand castings. On both the steps we installed, there were rough ridges of aluminum-different on each of the steps-which would dig into the anodizing of the mast. We filed these smooth before installing, which of course destroys the anodizing on the step. The entire back of each folding step was coated with Duralac before installation. About 10 seconds on a grinder or buffer for the back of each step before anodizing would be required at the factory to solve this problem.
Unfortunately, we have found this poor finishing detail to be all-too-common in the ABI castings in both bronze and aluminum that we have purchased in recent years. We have thousands of dollars in ABI hardware both on deck and below, much of it nicely finished. Many of the castings, however, have required hand-finishing on our part that should have done before the piece ever left the factory.
Among cruisers, mast steps are generically known as halyard catchers, and for good reason. They attract lines like magnets attract steel. It is almost impossible to prevent this without running a light wire from step to step, adding even more windage. Even then, lines can still snag on the wire. Careful placement of the steps, however, can at least reduce the problem.
The hardest part of the job is determining the spacing and placement of the steps. It is usually recommended that steps be placed at 18″ to 24″ intervals. In our experience, this spacing is too wide for most people. We placed our steps at intervals of just about 17″, and would not want them any further apart. The distance you have to span will determine the final spacing. We marked both sides of the mast for the locations of the steps before installation for fear of ending up, like some bad cartoon, with two steps in succession above each other on the same side of the mast.
We have yet to test the new arrangement in the real world, approaching some anchorage in a lumpy sea at the end of a long day. A safety harness attached to a halyard, or a device such as the SafBrak is an essential part of using mast steps once you get more than a few feet above the deck.
At the dock, our mast steps provide quick access to the lower part of the rig for maintenance, such as renewing the chafing gear at the spreader ends. Using a combination of the bosuns chair and the mast steps, I can reduce the load on the halyard for the first half of the trip when 105-lb. Maryann cranks me to the masthead with a bucket of tools.
Mast steps may not be pretty, but theyre almost essential for cruising in tropical waters.
Contacts- ABI, 1160A Industrial Ave., Petaluma, CA 94952; 707/765-6200. Pace-Edwards, 2400 Commercial Blvd., Centralia, WA 98531; 800/338-3697. SafBrak, Alfred Gilbert Enterprises, 2921 Wood Pipe Lane, Philadelphia, PA 19129; 215/849-4016.


