Shrink Wrapping Painted Hulls
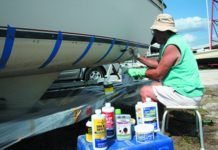
I covered my boat with shrink wrap this past winter for the first time. I followed all the advice concerning venting. I used prudent care during the heating phase of the installation to insure that the heat did not damage the painted hull, carefully prying the cover and inspecting as I proceeded to apply heat. At that time, I didnt notice any problem. The topsides had been (8 years previously) painted with a two-part urethane. Upon removal of the cover this spring, I noticed zillions of blisters in the topside paint where the cover came in contact with the hull. I opened several of the larger blisters and found what was apparently free water.
Apparently the equilibrium drive of osmotic pressure, because of the waterproof cover, drove either water vapor or free water beneath the painted surface and lifted it. Obviously, the paint job has been entirely ruined.
In retrospect, I should have expected this since the two-part painted surface would occasionally show blisters where the finely shaped bow and bootstripe would dip into the water when the boat rocked at the dock. I did contact the coating manufacturer who confirmed the blister problem occurring when shrink wrap is not extremely well vented.
Im probably not the first to discover this anomaly. Needless to say, I will in the future use a batten system under the shrink wrap to prevent any possible contact of the film (or other structure) from touching ANY of the painted finish, and will insure extreme venting occurs, including the sides of the hull.
Richard Hampel
Chalfont, Pennsylvania
No, unfortunately, youre not the first to experience blisters caused by shrink-wrapping a painted hull. Two-part polyurethane paints, as tough and glossy as they are, are not underwater paints. In the early 1980s, friends of ours made a circumnavigation in a 38-foot cutter that had been painted with two-part polyurethane. During the long passage from the Panama Canal to the Marquesas, the boat was mostly on one tack. On their arrival in the South Pacific, they were horrified to see that one entire side of the hull-where it had been immersed-had blistered.
You are quite right about the need to use battens to hold the shrink wrap off of the hull. We see boats in the yard here with a structure that permits bringing the shrink wrap below the toe rail (so rain wont reach the deck) and extended out from the hull several inches. A bit more trouble, but less effort than repainting the hull.
Herreshoff Cat Ketch 31
Shortly after reading your excellent article on the Herreshoff Cat Ketch 31 (February 15, 1991), I conducted a survey of a 1984 cold-molded H31. I found delamination of the fiberglass covering in the underwater hull at and below the transom connection. Also, the fiberglass had come loose and cracked along the concave shaped hull-to-keel connection allowing water to enter for a length of about 3 feet. The three bolts attaching the skeg were in good condition, but the skeg was loose; an added number of bolts is warranted.
John Palmieri
Marine Services
Portsmouth, Rhode Island
Head Odors Redux
I read with interest all solutions to this problem (February 1, 1998). The problem originates in the sea water line to the head. Usually, the head discharge is near the intake, so flushing pulls back some of the debris you are trying to get rid of. The odors are particularly bad when the head has not been used for a couple of days.
Heres the simple solution. My boat has the head sink drain teed into the flush water through hull so both use the same through hull. (If the boat isn’t plumbed this way, it is easy to do.) Then, whenever I detect a whiff, I fill the sink bowl with a little water and add some Clorox. While pumping the head, I pull the plug in the sink bowl and some of the water with Clorox gets pulled through the sea water line and into the head. This sterilizes the line and kills the bugs. No need for in-line dispensers, extra tanks, etc.
R. Muller
Richmond, Virginia
I also have fought the battle of the smelly head, and perhaps won some victories along the way. The lessons learned seem to augment various comments PS has published: 1) Standard 1-1/2″ ID sanitation semi-flexible tubing does not permit odors to penetrate, but cracked or pierced tubing or poor joints do smell. 2) Do not use silicone rubber or caulking compound as joint sealant; when flexed, they crack and leak. Rather, use 3M 5200 for permanent connections or 4200 (or equivalent) for reusable connections. 3) If the connection is not a perfect, barbed fit, then heat the flexible tubing in boiling water for a minute to soften for a more adjustable, forgiving fit. 4) Vent anti-siphon U loops overboard. 5) For leak hunting, place a sheet of newspaper around or under suspected connections to find the guilty parties.
Russell Dreyfus
Annapolis, Maryland
By tubing, we assume Mr. Dreyfus means hose. A couple of comments. Lab tests we have conducted show that raw sewage sitting in PVC hose will cause odors to penetrate the hose wall, so it is not just the joints that leak odors. This is why we recommend rigid PVC where possible. Heating PVC hose to fit over barbed fittings must be done very carefully, as too much heat will cause the hose to lose its structural properties and become weak. For related information, see the July 1 issue, page 20, Thoughts on Pipe.
Emergency Tillers
Much of what you said about emergency tillers (February 1, 1998) applies to my S2 9.2A. There is an emergency tiller, but its easy to forget where it is in the bottom of a locker. The lever arm is too short for it to have much value. The metal could be uncomfortably cold to hold onto in cool weather.
My fix was to take an old hickory ax handle, cut it to suitable length, and round off one end to make a tight press fit into the end of the steel emergency tiller. Removing the Edson wheel is necessary to get clearance, but that isn’t much of a problem.
Even with the extension, the tiller is too short to have enough leverage for comfortable steering. Fortunately, one of the uprights for the pushpit is almost exactly abeam of the end of the tiller, so its easy to rig a piece of 1/4″ nylon line as a tackle to control the tiller. Setting up a tackle with two blocks would be good, but it really isn’t necessary. Just pass the line back and forth a few times from a loop of line at the end of the tiller. A little friction in the system is OK and may indeed be helpful.
Robert Gillette
Poland, Ohio
On larger boats, a common method is to use blocks to lead control lines to the sheet winches. Unfortunately, it seems that nearly all emergency tillers are too short to hand steer.
We appreciate the nice comments about our emergency tiller installation on the Island Packet 350. All our current models are configured in the same way.
The added comment regarding a significant fault because of the possible difficulty of rigging an emergency-emergency tiller, in the event of loss or breakage, is a bit strong. Is this like criticizing car makers for not providing a spare-spare tire in case the one provided is flat?
Regardless, your writer overlooked our built-in back-up provision for just such an event. Every Island Packet has a large, well-chamfered hole in the top aft corner of the rudder which allows a bridle attachment of a strong line that can be led to both stern cleats. Trimming these two lines allows helm control, or the rudder can be secured in any position. This hole can be safely accessed from the built-in swim ladder. I do not know of any other builder providing this simple safety device. Robby Robinson and Michael Badham even mention this feature in their recent book, Sailors Secrets (Ace in the Hole, page 10).
Robert K. Johnson
President, Island Packet Yachts
Largo, Florida
Where Credit Is Due…
To Ideal Windlass Co. & Ronstan International: I have been remiss in not reporting two great vendor experiences, stories that give heart to the occasionally disillusioned.
We purchased an on-deck horizontal windlass for our Bristol 41.1 from Ideal Windlass Co. in East Greenwich, RI. However, when the yard owner, Jeff Curtin in Westerly, attempted to install it, he felt that it would clutter the deck and recommended that with shoring up it should go into the anchor locker. Cliffe Raymond, owner of Ideal Windlass, agreed and redesigned and custom built a vertical windlass that would fit into the locker comfortably. All at no additional cost to us. Bravo.
We had a couple of boom vangs on our Bristol that were about 15 years old on which the cam cleats had lost their ability to spring back. Unable to find replacement cams (the model was outdated), I contacted Dick Pritchard at Ronstan International in Largo, Florida. At his suggestion, I sent him one of the vangs and he immediately replaced the cam cleat. Again, at no cost to us. Bravo again.
Richard M. McCostis
Ludlow, Vermont


