Dismasting is right up there among a sailor’s worst nightmares. When a mast comes down at sea, no matter how or why, there’s tremendous potential for further damage. Few things will sink a boat quicker than the end of a mast holing your vessel. Speed is of the essence when such a calamity occurs, and the number-one priority is getting rid of the danger as quickly, and safely, as possible.
In most circumstances on most boats, the quickest and safest way to accomplish this is to remove the clevis pins securing the rigging, either by simply pulling them out (if they aren’t under load) or knocking them out with a drift and hammer. Several things, however, will work against you. First, cotter pins are often badly installed, with the ends left too long and wrapped completely back around the clevis pin. Second, in any sea condition other than a glassy calm, there will be a load on at least some of those pins, sometimes a tremendous load, and it will usually move from terminal to terminal, very quickly, depending on how the boat is rolling and where the remains of the mast are resting. Third, getting your hands and tools into position to work with the terminals is almost always a truly dangerous proposition. Extreme care needs to be taken to ensure that when the rigging is separated from the boat, it doesn’t take a piece of you with it.
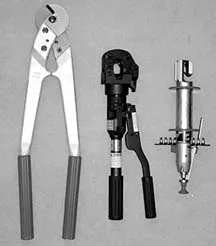
If clevis pins can be quickly and safely removed and the mast secured without damaging the boat, consider yourself lucky. Unfortunately, when Murphy is doing his best, it may not be possible or prudent to deal with the pins. At this point your only option is to cut away the rig.
We tested three kinds of emergency cutter, using common sizes of wire cable for standing rigging and halyards, as well Navtec rod rigging in different diameters. (Note that these were tests of cutter types, not different products within those types.) We also tried cutting with the old standby-a hacksaw.
Hacksaw
On many, if not most boats, the only suitable tool on board will be a hacksaw. It performs better than we expected, particularly on smaller rod, but there’s no question that it takes the most time and is exhausting, particularly when cutting larger diameter rigging. For example, we took 20 seconds to go through 3/16″ 7×19 wire, 40 seconds to cut 1/4″ 1×19 wire, 25 seconds to cut -4 (0.172″) rod, 70 seconds to cut -40 (0.5″) rod. This is a job for the strongest member of the crew, preferably also the one in best aerobic condition. Adrenaline might speed things up a bit, but exhaustion could slow things down.
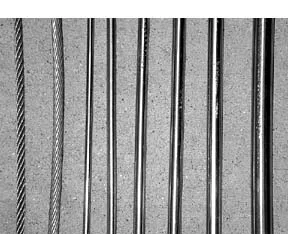
We tried a number of blade materials and pitches suitable for metal cutting. Bi-metal blades, while somewhat more expensive, are more resistant to breakage and the only way to go. The coarser, 24 tpi (teeth per inch), pitch was significantly quicker cutting rod than finer, 32 tpi, pitch, which was quicker on cable. We also tried a carbide grit wire “blade.” It proved the quickest initially, but was only good for two or three cuts before becoming ineffective as the carbide bits were worn or torn away.
Cable under tension is not too difficult to cut, both 1×19 and 7×19, but things are trickier when you have to hold the wire to cut it. For us, the last few strands were nearly impossible because it was so difficult to keep them steady while sawing. Linesman pliers or larger side-cutting pliers worked better to quickly cut those last strands in these circumstances.
Muscle Power
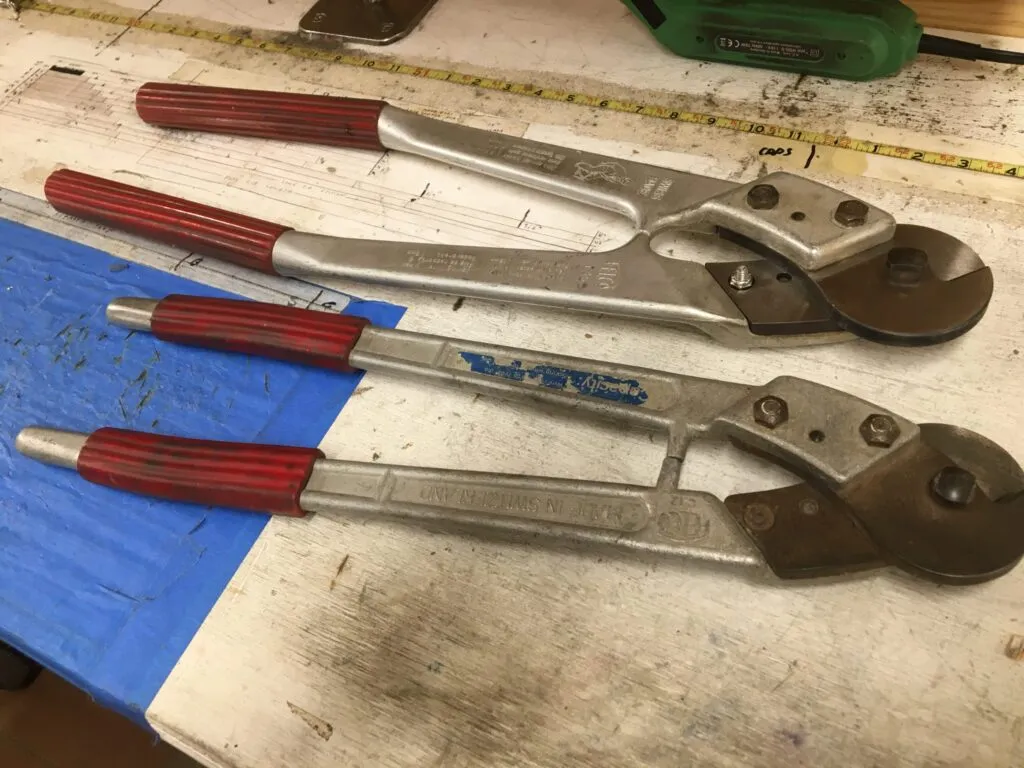
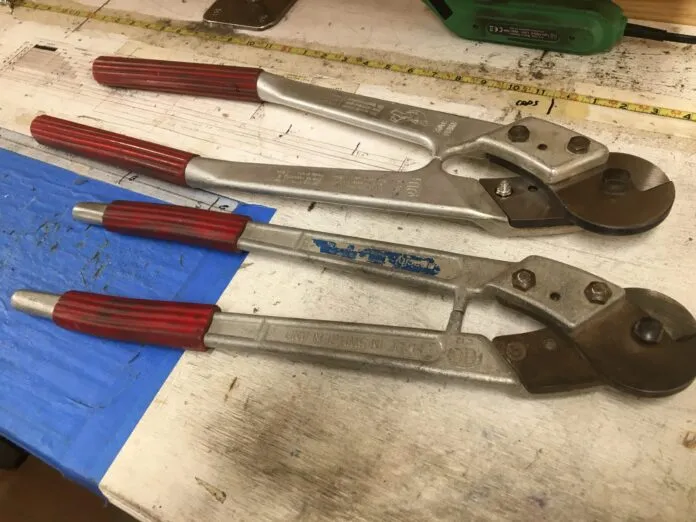
Swiss made Felco C-16 Cable Cutters are a big step up, both in ease of use and price ($350). These popular cable cutters are generally sold for use only on cable up to 5/8″. Though we have had reports of their use on up to -12 (diameter) rod, the reports all indicate extreme difficulty in use and some damage to the blades after only a single cut. Since we were requested not to damage the tools lent us, if possible, we didn’t test them on rod.
If you’re strong enough, there’s enough leverage with the 22″ long handles that you will be able to cut smaller cable straightaway. However, for most of us and for even modest sized cable, you’ll need to rest one handle against the deck or some other suitable unyielding spot and lean into the other handle with all your weight. The illustration molded into one of the tool’s handles shows the user sitting on one handle to cut a cable.
Using body weight for full effect, the blades quickly severed both of our 1×19 and 7×19 wire. It is irrelevant if the wire is under tension or not,
The Felco cutters have aluminum handles, which keep weight to a manageable 5.4 pounds, with large plastic grips. The blades are high carbon steel and will require suitable protection from the marine environment while in storage. The blades can be sharpened and are replaceable, though we were not able to determine a cost for replacement.
There is no lanyard hole or attachment incorporated in the tool, though something suitable could be jury-rigged, or better, a hole could be drilled at the end of one of the handles.
Any tool used on deck, and particularly any tool you expect to use in emergency conditions, should be tethered to the user to prevent loss.
Felco cutters come with a lifetime limited warranty covering manufacturing defects.
Hydraulic Power
Ratcheting up the expense and capability are hydraulic cutters. We tested the Huskie Tools model S-24, commonly offered to the sailing community. For a wallet-emptying $1,200, this tool had best deliver, and it does. The S-24 weighs in at a hefty 9.2 pounds and is 17 inches long overall. Think of this as basically a hydraulic jack with the ram providing 7.2 tons of shearing force, enough to cut -40 rod, the thickest we had to test.
The tool is awkward to handle with all the weight at the forward end. The head pivots opens up to accept the rod or cable, snapping shut with a massive spring-loaded latch to hold it together against the tons of force exerted against it while cutting.
Once the head is closed over the rigging, you pump the smaller handle to shear the cable or rod. Use is self-evident, though care must be taken to ensure the head is indeed latched, and to keep the tool perpendicular to whatever is being cut. A lever on the side is depressed to release the cutter for the next cutting effort.
Actually operating the pump handle requires relatively little effort, though it does take noticeable effort for larger rod. In any case, most any crewmember should be able to do the job. The rubber grips provide a secure handhold.
With the exception of the shearing blade and the ram, the unit is painted, but it’s not stainless and will require careful storage to prevent corrosion. A soft nylon carry case is included and a spare shearing head is hidden in the handle. This replaceable shearing head is held in place with a threaded through-pin with slotted heads. Changing it out is easy, but not something you’d want to do where that pin could be easily lost.
Since it’s a hydraulic mechanism with seals subject to deterioration, it should be exercised regularly to ensure it will work when needed.
The hydraulic unit can be rebuilt and the shearing surfaces “sharpened.” There’ s no provision to attach a tether; the best you’re likely to be able to do is to tie one around the primary handle.
Husky provides a five-year limited warranty.
Gunpowder Power
An innovative and unique purpose-built tool just introduced in the U.S. is the German-built Toolova Shootit 12. This is known technically as a Powder Actuated Tool (PAT), one that is powered from a “load,” which looks for all the world like a small caliber firearm cartridge. At first glance, you might think it was a .22 caliber rimfire blank cartridge, but it’s actually .27 caliber. Unlike a typical blank, the casing is crimped closed on the end and then sealed. There’s no wad.
Firing the load ignites the gunpowder, and the explosion drives a piston that actually does the work. Anyone who has used a powder-actuated fastener tool to set a nail in concrete will be familiar with the basic principle.
Instead of firing fasteners out the end, the piston acts as a shear against an anvil integrated into the forward end of the tool, cutting whatever wire or rod has been placed in the slot between the piston and the anvil.
The Toolova proved extremely effective, instantly severing all the cable and rod up to -22 (0.375″). The -40 rod was too big for the slot.
The Toolova’s importers, Euro-Marine Trading, were kind enough to loan us the first tool brought into the US, even before they’d had a chance to try it out themselves. Somewhere in the process we missed the instructions that it was meant just for cable. Could have fooled us.
Later we were told that the tool for sale had been upgraded with a tougher anvil material to allow for cutting rod up to 0.375 inches, which performance we can verify. The harder material provides greater safety margins, but there’s no visible or operational difference.
The body of the tool is constructed of “high-tensile steel,” to provide the strength required, and is nickel-chrome plated. Smaller parts are stainless or powder-coated for the most part, but we found a few bits and pieces of plain steel, some with a simple black coating, not the best choice for a marine environment. We experienced a problem with the body coming loose and unscrewing after a number of operations. We are told this problem would be addressed.
The loads come in quantities of 10, held together in a plastic strip. The loads are coated with lacquer and in our testing they survived three days immersed in a bucket and functioned properly immediately upon removal. As an aside, it’s interesting to note that powder-actuated tools were first developed for shipbuilding operations that required fasteners to be installed underwater in some situations.
We found the 13-1/4″ long, 6-lb, $585 Shootit 12 somewhat awkward to use. Unlike most PATs designed to use such strip loads, this is not a semi-automatic, or even pump-operated mechanism. The single shot design requires the breech to be unlocked and opened, and the strip manually moved to the next load before closing and locking the breech. It sounds worse than it is, but it’s also much worse than it needs to be, based on other PATs we’ve used. With a little practice, it can be accomplished in a matter of seconds, but there’s plenty of room for error and even injury in the process.
The cocking and firing mechanism is also a bit cumbersome. A large hand guard that also serves as a safety mechanism is rotated counter-clockwise, after which the plunger-style cocking handle can be pulled out against a stiff spring. The spring-loaded firing lever slips into a slot to hold the firing pin back. It is designed such that if the cocking handle is released prematurely (and the spring is strong enough that this may occur) the aft end of the firing lever prevents the firing pin from making contact with the load. Unfortunately, it’s possible to inadvertently squeeze the firing lever while cocking the tool, which defeats this safety feature.
Once cocked, firing the tool is accomplished by simply depressing the firing lever once the rotating safety is in the off position. Because of the weight and unwieldiness of the tool, our natural inclination was to operate it two-handed, one holding the tool, the other squeezing the trigger. We found it very easy to hold the tool in a way that the cocking handle caught the palm of our hand as it was fired, causing a misfire.
Later, during discussions with the importer, we were advised that this design was settled upon to allow one-handed operation, with the obvious significant benefit that the other hand remains available to hold on to the boat.
Grasping the barrel between the hand guards with one hand, the trigger lever down, you can operate the trigger lever using your pinky finger. Unfortunately, the design of the rear hand guard-cum-safety doesn’t lend itself to operation with one hand, somewhat defeating the advantage of the design concept and compromising safety.
Nowhere in the instructions we received is one-handed operation illustrated, though a brochure we were given later does make mention of this capability. We found the provided rudimentary instructions inadequate because of this and other failings.
These are all problems that would be eliminated if a conventional pistol- style handgrip and trigger system were used. That would make the tool far easier to use one-handed, in our opinion. We are told that such a design was tried, but the existing design was the one best liked by testers. The manufacturer’s explanation to us regarding tool balance to the contrary, in our opinion nothing inherently prevents a pistol grip design from being utilized and producing a well-balanced tool with functional and safety advantages.
The load is surprisingly quiet when it goes off, and there’s no recoil to speak of because of the tools weight. There’s a 5/16″ hole in the front hand guard that can be used to attach a tether.
The tool comes with two strips of loads, 20 shots; additional strips are $10 each. Safety goggles are provided and the instructions advise the use of safety goggles and gloves during use. We can easily imagine many situations where wearing such goggles would be impractical, considering the circumstances when the tool may be called upon. It’s an imperfect world, and sometimes the legal department’s best efforts go for naught.
The Shootit 12 comes with a two-year limited warranty and a mandatory two-year repetitive inspection interval, to be performed by the manufacturer. The cost of this inspection has not yet been established.
Alternatives
We also tested some alternatives to see if other avenues might be worth pursuing. It was recommended by one rigging expert that we try a metal cut-off disk. We borrowed a 14.4-volt battery-operated power saw from Makita, but the 1000-RPM it produced wasn’t enough for the disk to work. The same size metal-cutting disc fitted to a 120-volt die grinder made quick work of rod, cutting through -22 rod in just 15 seconds.
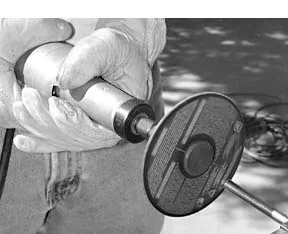
A cordless 12-volt drill with the same size disc required 70 seconds to slice through-17 rod. With no safety devices, that naked cutting disk probably isn’t a great choice on deck, even if someone eventually produces a cordless tool with the oomph of a die grinder (we couldnt find one in our tool search).
A battery-powered Dremel Tool with a cutting disk lacked the power to cut through anything but the thinnest rod, and even that took more time than a hacksaw. We also tried a reciprocating saw with various blades, expecting it would at least equal the hacksaw, but with less effort. It proved remarkably useless. None of the brand- name reciprocating blades we tried lasted long, the material obviously wasn’t up to the steel used in the rod.
Conclusions
Ergonomics, safety, and other issues aside (because everything is a compromise), the Shootit 12 is the easy choice for best emergency rigging cutter. Despite what we consider a relatively awkward design, it produced the quickest results with the least effort at a cost that, if not inexpensive, is less than half the hydraulic cutters.
The tool came to us in a fitted lightweight plastic case that was already cracked and broken, and whose latches broke immediately after we received it. It certainly needs and deserves something better for storage. A tough, waterproof Pelican-style case would be ideal.
Instructions need to be substantially improved-both the operation and safety aspects. In fact, an instructional video covering both use and safety might be the best plan. If you buy a Shootit 12, take to heart the company’s recommendation to practice first before having to use the tool in an emergency. There are too many safety and functional idiosyncrasies to expect anyone to be able to grab it and use it effectively in an emergency. Any of the crew that could potentially use the tool should be included in such training. In fact, that goes for any type of cutter.
The hydraulic cutters have met their match in the Shootit 12. We can’t see any reason to spend as much as twice the money for something that isn’t as easy or quick to use, unless you have rod rigging so large that the Shootit 12 won’t work.
For wire rigging the Swiss-made Felco cable cutters are effective and affordable, though they’re not easy to use. The larger the wire, the more difficult it will get.
There are compounding mechanisms that make tools of this general type easier to use and more efficient, at the cost of simplicity.
Whatever cutting device you decide on, keep familiar with it.
Thanks to Landfall Navigation of Greenwich, CT for providing our evaluation tools, including the Shootit 12 that Euro Marine Trading (Shootit 12 distributor for the U.S. and Canada) made available even before they had an opportunity to test it themselves.
Contacts- Euro Marine Trading (Toolova Shootit 12), 62 Halsey St., Unit M, Newport, RI 02840, 401/849-0060; www.euromarinetrading.com. Landfall Navigation, 354 W. Putnam Ave., Greenwich, CT 06830; 800/941-2219; www.landfallnavigation.com. Felco SA Mlzes 4, CH-2206, Les Geneveys-sur-Coffrane, Switzerland; 41 32 858 14 66; www.felco.ch/en/monde.asp. Huskie Tools, Inc., 198 Brandon Dr., Glendale Heights, IL 60139; 630/893-7755; www.huskietools.com.




Thank you for this article. A few images/graphics would have been helpful.
There are well reviewed Chinese made hydraulic cutters on Amazon for ~$200.