Although laminating epoxies can tolerate some moisture, we know that excessive moisture can prevent a good cure. So how can we manage an emergency repair, when water is seeping into the bilge through a hairline crack—or worse? Well, there are products intended for underwater use, we’ve used them, and they work.
Although a collision with a reef or shipping container is the nightmare scenario, it really isn’t that easy to knock a hole in the hull of a well-found boat. An enlightening article in Yachting Monthly about emergency leak repair methods noted that it took a marine professional armed with a hammer and chisel 25 minutes to breach the solid-laminate hull of their test boat.
If you rip a 2-foot hole in the hull, there is probably nothing you can do anyway. But far more boats are lost because of a smallish crack around a through hull, rudder tube, or bow thruster. We’ve hit some hefty submerged logs that were brought down by spring floods. The hull always bounced off with barely a smudge on the antifouling paint, but rudder shaft or daggerboard case was always more vulnerable, bending, cracking, and sometimes leaking. However, these leaks are fixable with a few scraps of wood and some screws—or even underwater epoxy.
What We Tested
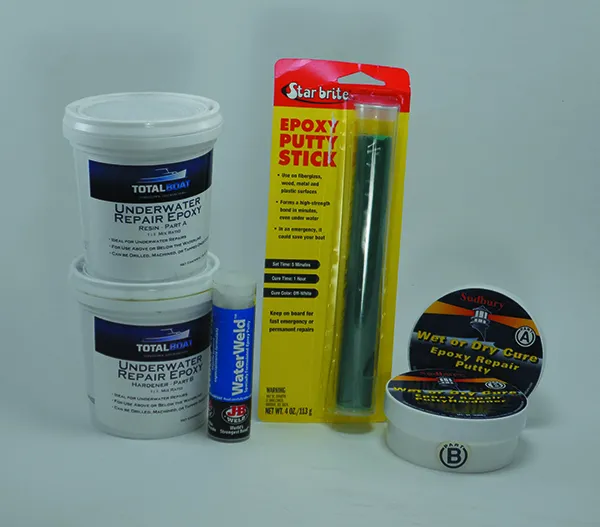
In addition to their more traditional repair or laminating epoxies, many vendors also offer underwater cure products, designed for both temporary and permanent repair when hauling out and drying is not possible. The products we tested included Pettit Splash Zone, JB Water Weld, Total Boat Underwater Repair Epoxy, Star brite Epoxy Putty Stick, and Sudbury Wet or Dry Cure Epoxy Repair Putty, representing a cross-section of the types on the market.
How We Tested
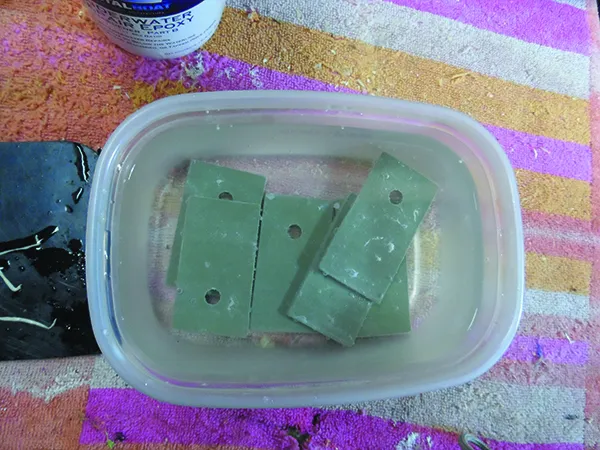
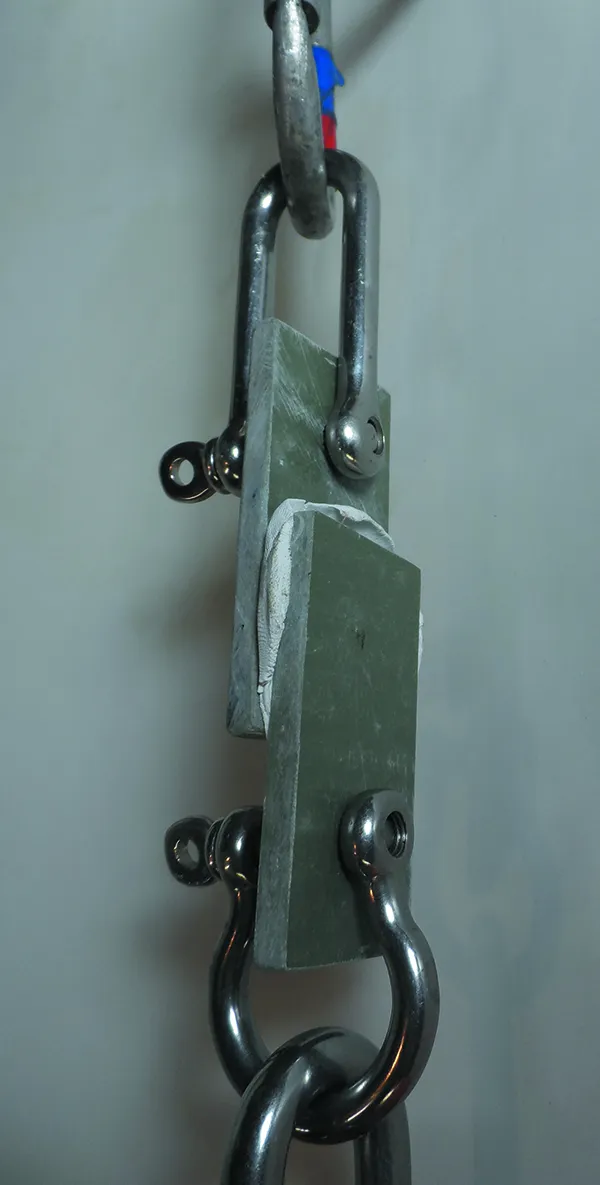
First, we made up fiberglass test coupons, sanded them with 60 grit paper, and bonded them together with underwater epoxy. One set was made up dry, and the other set was bonded underwater. These were pulled to failure in shear to determine relative bond strength.
We then cut a rectangular opening in the side of a plastic bucket, bolted a gasketed, replaceable fiberglass sheet over the opening, and then cut 1/8-inch slits in the fiberglass sheet to simulate cracks. We then fill the bucket with 65F water and attempted to seal the simulated cracks from outside while the water was flowing, judging both difficulty in working with material and the soundness of the patch after curing.
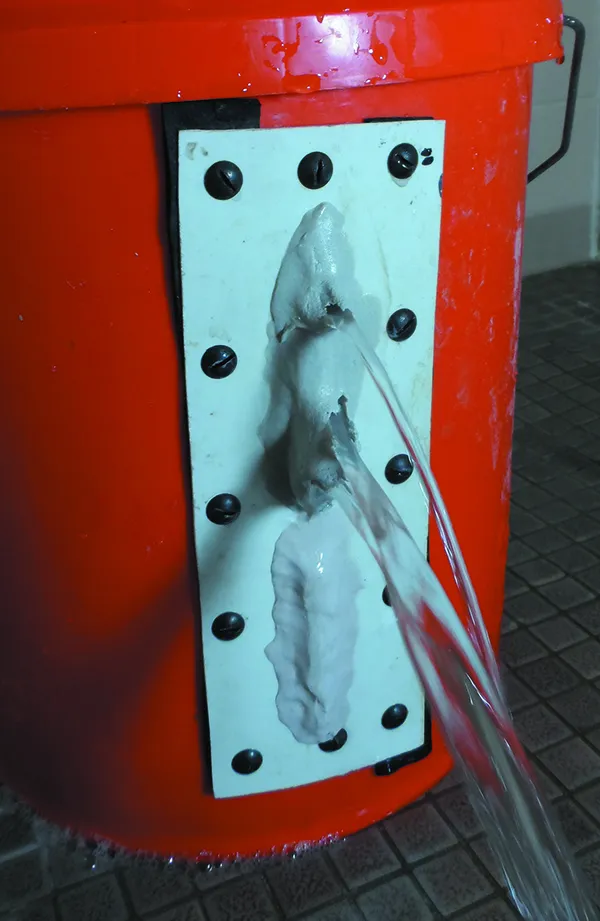
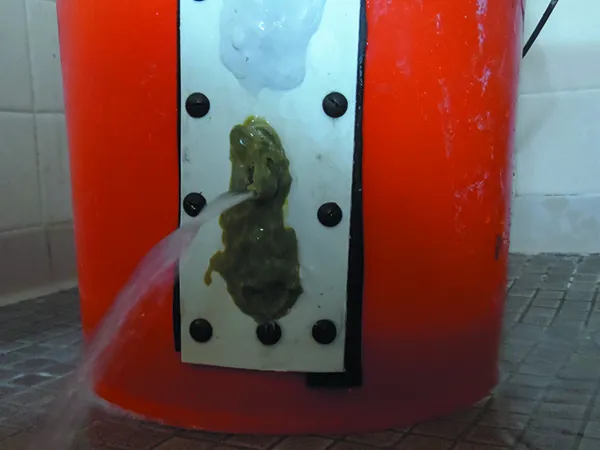
The stick products are stiffer than the tub products. As a result, they are harder to mix and slightly more difficult to get a good bond, but they are superior for stopping an active leak. The tested stick products permanently stopped the 1/8-inch saw cut leak within moments, while none of the tub products held for more than a few minutes.
- Sudbury Wet or Dry Epoxy blows out (top), but JB WaterWeld holds tight.
- Products packaged in tubs bond well but lack the stiffness to stay put under pressure..
- Fiberglass samples were soaked for several weeks before bonding.
- This Star brite sample undergoes shear testing. The epoxies were allowed to cure for 48 hours before shear testing.
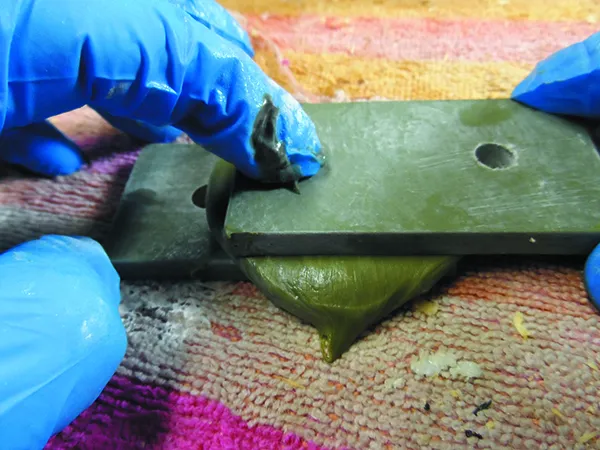
- Testers apply pressure to wet fiberglass bonded with Total Boat Underwater Epoxy. Lapping over screw holes creates a mechanical hook.
Observations
Low Strength. The rated tensile strength of these products is 3-8 times lower than laminating epoxies but comparable to filler products, such as Marine Tex. The sticks have enough adhesion to stop a leak, but will need reinforcement.
The tub products are stronger and can produce a permanent repair, depending on the stress and geometry. Our advice, as with duct tape, is to use a lot. Clean a large area, maximize bond area by smearing it out and rubbing it in, and don’t be shy about thickness. Try to avoid high stress for several days; although they appear cured in less than 8 hours, strength continues to increase, sometimes as much as double, over the next 2 days. Our reported strengths are at 48 hours.
Surface Preparation. Obviously, we can skip the “dry” part. But it’s still important that the surface be clear of loose material and dirt. If you’re working from the outside of the boat, the slime must be scrubbed off and antifouling paint must be sanded away to bare laminate.
In the bilge, mud, slime, and oil must be scrubbed off and rinsed away with clear water (fresh or salt). All surfaces should be scratch sanded to create a tooth; 60 grit is not excessive. Most plastics bond reasonably well if sufficiently roughed up; we’ve had good experiences bonding float switch brackets. It also helps to create a mechanical lock around the object. In the case of a float switch, the epoxy must surround the base, forming a buttress. Lap the epoxy up and over screw indentations, creating a mechanical hook.
If you’re repairing a hole in the hull, try to repair from both the inside and the outside; where the two applications meet they will chemically bond and become one piece. Cram the epoxy deeply into cracks and fissures so that it can key into irregularities. If some of the epoxy extrudes out the opposite side of the hull, good. Press it back on itself, like upsetting a rivet.
Low Exotherm. Even fast-setting underwater epoxies, such as JB Weld WaterWeld, set without appreciable exotherm. If we were to mix the same thickness of laminating epoxy, within 10 minutes it would begin to heat, reaching 300F or more, bubbling, and becoming brittle. Underwater epoxies don’t do this, even above water. This is in part because they aren’t as strong. Fewer chemical bonds are created per unit volume, generating less heat.
Application
Once applied, the thermal mass of the boat moderates temperature rise. Application also tends to go more quickly. Instead of fooling around with positioning glass and wetting it out, you mix up a golf ball size piece and smash it into the crack or cavity. Yes, if you mix up a fist-size chunk and then do nothing with it, you’ll feel the heat. Don’t do that. Underwater there is water cooling.
Cold Water. Most of us don’t sail when the air is icy, but even summer sailing in the Great Lakes, Maine, or the United Kingdom has water temperatures below optimum for curing. Expect a slower cure and reduced strength. Only Simpson FX-764 is recommended for use below 50F.
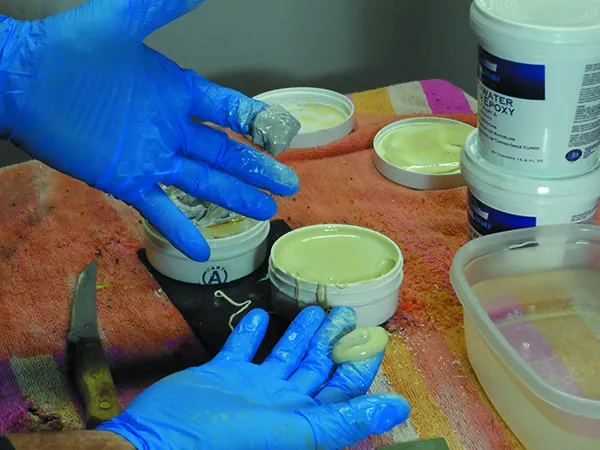
Mixing. Stick products (JB WaterWeld and Star brite Putty) are cut to length, insuring a perfect ratio. They are very firm and are mixed by repetitive folding and kneading. Tub products are softer and are best mixed by rolling a ball between moistened palms.
All of the products are super sticky; a strong grab is vital when working underwater. The epoxy will stick to your hands more than the work piece, so keep your hand wet; underwater this happens naturally, but working in the bilge you may have to remember to wet your fingers, as you would when rolling meatballs. Press the epoxy firmly in place, wiggling the wad and pressing down firmly to get a good bond. Rub it down thoroughly with wet fingers, tapering the edge into the substrate.
Although Pettit states that working with bare skin is acceptable and it is true that the epoxy sticks more to gloves. But gloves work just fine as long as you keep them wet. In cold field conditions, warm the two parts to room temperature before mixing; the sticks are very difficult to mix below 60F.
Working Time. Like laminating epoxy, underwater epoxy bonds best when fresh. Try to apply the mixed epoxy within a few minutes. Once it begins to kick, even though it may still feel workable, it will not bond as well. Better to throw the remainder away and mix a fresh batch.
Not for Potable Water. None of the tested products are rated for drinking water. Among other things, it is too difficult to insure a perfect mix.
Underwater Epoxies
| TYPE | CONVENTIONAL EPOXY | UNDERWATER EPOXY | ||||||
|---|---|---|---|---|---|---|---|---|
| MAKER | West Systems | Marine Tex | JB Weld | Star brite | Pettit | Total Boat | Sudbury | Simpson |
| PRODUCT | 105/205 | Epoxy Putty | WaterQeld | Epoxy Putty Stick | Splash Zone A-788 | Underwater Repair Epoxy | Wet or Dry Cure-Epoxy Repair Putty | FX-764 |
| PACKAGING | Tins | Tins | Stick | Stick | Tub | Tub | Tub | Tub |
| FIRM TIME | 4 hours | 1 hour | 15 min. | 15 min. | 2 Hours | 2 Hours | 2 Hours | 2 Hours |
| FULL STRENGTH TIME | 16 hours | 24 | 2 hours | 2 hours | 8 hours | 6 hours | 10 hours | 24 hours |
| MINIMUM TEMPERATURE | 40 hours | 50 hours | 50 hours | 50 hours | 50 hours | 50 hours | Not published | 40 hours |
| PUBLISHED TENSILE STRENGTH | 7800 PSI | 4000 PSI | 1300 PSI | Not published | 4100 PSI | Not published | Not published | 3450 PSI |
| PUBLISHED SHEAR STRENGTH, FIBERGLASS | None listed. | None listed. | None listed. | 500 PSI | None listed | None listed | None listed | 1300 PSI |
| DRY | >2600 PSI | 1400 PSI | 500 PSI | 460 PSI | 1350 PSI | 1250 PSI | 350 PSI | 1300 PSI |
| WET | Not tested | Not tested | 450 PSI | 340 | 1000 PSI | 1100 PSI | 180 PSI | 1200 PSI |
| SAG | Must be thickened | None | None | None | Slight | Slight | Slight | None |
| PRICE/VOLUME | $150/153.5 oz. | $45/11oz. | $5/2 oz. | $16/4oz. | $63/32oz. | $52/32oz. | $26/6oz. | $154/64oz. |
Stopping Leaks. The stick products are stiffer than the tub products. As a result, they are harder to mix and to achieve a good bond, but they are far superior for stopping an active leak. Both of the stick products permanently stopped the 1/8-inch saw cut leak within moments, while none of the tub products held for more than a few minutes.
Even when we reached inside the bucket and pressed the extruded material over the crack from the other side, like upsetting a rivet, they blew out within a few minutes. The tub products can stop a leak if applied from the outside (pressure side), if you apply enough and the crack is not too large. In this case, it also helps to make the gap smaller by filling with wadded up fiberglass cloth or wood scraps.
High pressure. An advantage of fast cure products is that you can hold them in place by rubbing them down until they begin to stiffen. When working deeper in the bilge, with more pressure, the required 15 minutes passes slowly when stopping a leak.
Just as a welder will tack pieces together to hold them in place and prevent warping while he runs structural beads, I often tack projects together with thickened 5-minute epoxy, before laying on the filets of thickened epoxy that will provide the actual strength. The same is true with underwater epoxies and leaks. Push in some stick epoxy to stop the flow, and then reinforce inside and out with a stronger tub product or conventional laminating products and procedures.
The tub products are better at repairing a ding that is not leaking, such as one resulting from grounding or striking dock. Lower in viscosity, they flow more deeply into the cracks and fissures, and the resulting repair may well be permanent, assuming no structural damage was done.
Shelf Life. Every so often we hear reports of stick-type putties that just crumbled when mixed. We’ve seen this too, although the product was opened, half used, and probably a decade old. The two parts are not separated by a physical barrier, only their extreme viscosity, and over time this close proximity does some damage.
Star brite states the unopened shelf life is two years and advises no more than 6 months for opened packages. Two-tub epoxy products and laminating epoxies typically have very long shelf lives.
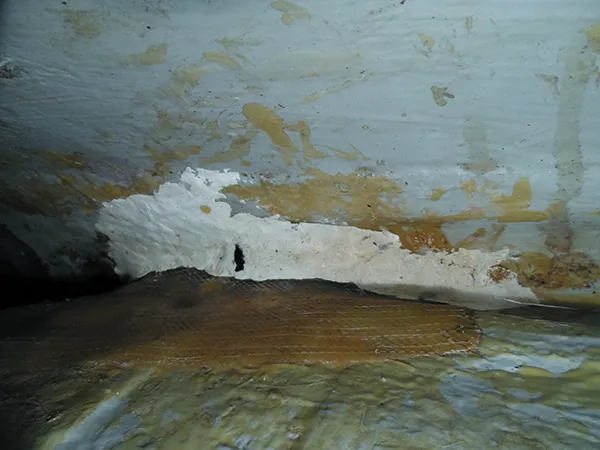
possible once the leak was stopped.
Pettit Splash zone A-788
A soft putty, Splash Zone becomes firm within 2 hours and fully cures in 8 hours at 70F. It should not be exposed to temperatures below 50F for 6 hours. It cures hard, and is nearly 50% of the strength of conventional epoxy products.
Bottom Line: Recommended for underwater dings and general repairs below the waterline and in the bilge.
Total Boat
Very similar to Splash Zone in all characteristics. Firm in 2 hours, cure in 6 hours at 70F. Strong, but won’t hold back a water leak.
Bottom line: Budget Buy for underwater dings and general repairs below the waterline and in the bilge.
Sudbury Underwater Epoxy
A little more difficult to mix, more prone to sagging, weaker than Total Boat and Splash Zone, and more expensive, it was not our favorite.
Bottom line: There are better products.
Simpson FX-764
We’ve used this in industry to repair concrete wastewater tanks in the winter, and the National Park Service uses it to install in-stream monitors in icy trout streams. Although slow curing, it has the advantage of working down to 40F and slightly below, which should be enough for arctic explorers.
Bottom Line: The Best Choice for cold water sailors.
JB Weld WaterWeld
WaterWeld is sticky, completely non-sagging, and stiff enough to hold back water. This is what you’ll reach for when water is coming in.
Bottom line: Our Best Choice for stopping leaks and mounting sump floats.
Star Brite Epoxy Repair Putty
Very similar to JB WaterWeld, this is just a little harder to mix, a little stiffer, and did not seem to adhere quite as well. But it was close.
Bottom line: Recommended for stopping leaks and mounting sump floats.
After all of the lectures about the importance of good surface prep, we had a hard time believing we could get a good bond under water. So we had to test. Underwater epoxies are super sticky; a strong grab is vital when working underwater. Wet your hands frequently to prevent this. Mix by rolling between palms or folding back and forth, but always keep it moving. The corollary is that you must press and kneed the products on to the surface for several minutes to force the water out and create a bond. Just keep rubbing until it sticks. Following this procedure, we never experienced a failure to bond, not even crawling in the bilge fighting active leaks.
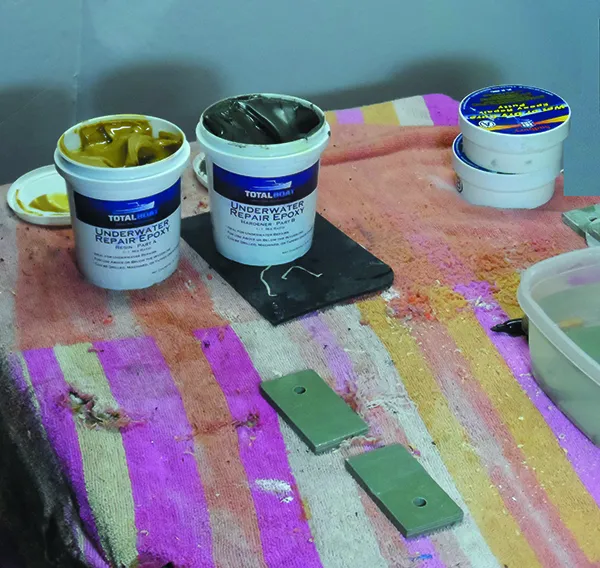
- The test setup: Water (in plastic container, partially visible) is for wetting hands before working, the fiberglass coupons are ready for gluing, and the test epoxies are lined up and ready to apply.
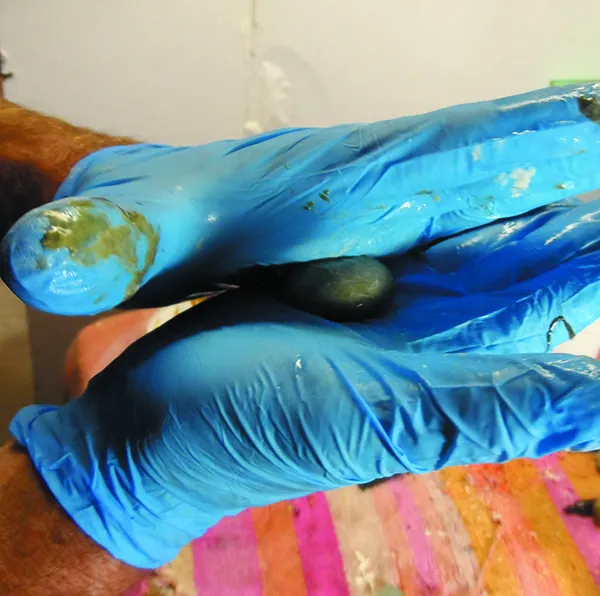
- The stick products are very firm and are mixed by repetitive folding and kneading. Tub products are softer and are best mixed by rolling a ball between moistened palms, as shown here.
- Some products, such as the Pettit Splash Zone A-788 allow bare hands, but our testers wore gloves. The gloves are stickier than hands, but as long as they were kept wet, this was not a big problem.
Conclusion
Can these products actually seal underwater leaks in field conditions? In fact, we’ve repaired minor leaks on our test boats working from the bilge. We interviewed multiple marine professionals who related stories of temporary underwater repairs. While you’re not likely to glue a patch over a gaping hole, you have an excellent chance of staunching even a considerable leak around the cracked a rudder tube or through hull fitting.
Need to make your repair a little more permanent, since you have a ways to go to drydock? Get the area dry by sealing with underwater epoxy, and then laminate over it using conventional materials. West System G-Flex bonds reasonably well to wet surfaces and can be used as a laminating epoxy.
In combination with plywood, fiberglass sheets, and a bunch of screws, considerable emergency repair may be possible. Consider putting a patch on the outside as described above in “Yes, You Can Laminate an Underwater Patch.” Although not pretty, a very strong repair can be created. Once the boat is lifted out, you’ll want to grind it off and do a proper repair; such is boat work.
Testing quickly divided the products into two groups. Sticks are fast, stiff, of limited strength, and good for stopping active leaks. The slow cure and lower viscosity of tub products means they are not so good at stopping leaks, but they are stronger and make permanent repairs. Each has a different purpose.
We think it’s prudent to keep a stick in every boat tool kit, plus tub of underwater repair epoxy in the locker if you are going far.
STAR BRITE, www.starbrite.com
JB WELD, www.JBWeld.com
MARINETEX, www.marinetex.com
PETIT, www.totalboat.com
SIMPSON, www.strongtie.com
SUDBURY, www.sudburyboatcare.com
WEST SYSTEMS, www.westsystem.com














Searching for the best marine epoxy to do some repairs on my boat and other marine watercraft requires in-depth consideration. Thank you so much this information was certainly helpful
The going wisdom is that epoxy does not do well wet or underwater, in particular West. I beg to differ. After rebuilding the cockpit of a laser in our junior sail program, including the delaminating around the skupper, less than 10 min later before the resin even started to warm up the skies opened up.
Within a short period of time the entire cockpit was full of water. What was I to do? Well, years later that boat sailed by an entire cast of intrepid young sailers beat the heck out of it torquing the hull in heavy winds with too many kids on board and capsizing countless times because it is fun, West continues to hold up well.
Did you attempt to test kits from the hardware store for emergency water pipe repairs? For instance, RectorSeal’s Pipe Repair Kit, available at Home Depot? They use a water-activated epoxy that sets in 10mins. I wonder how they would do for below-water repair.
I love JB-Weld. It saved me in the Bahamas!
First a little background to set up the situation.
My boat Prestissimo has a steel lifting keel that is filled with diesel fuel, both to prevent rusting and to have a backup of 35 gal of fuel that I can pump out if necessary.
Every now and then, when I am anchored, and there is wind opposing current, the boat will swing around and wrap the nylon anchor rode around the keel. Once on our Bahamas trip it got pretty rough before I finally got it straightened out.
With the nylon rode stretching and contracting and rubbing across the back of the keel, the epoxy/glass layer wore through and exposed the steel to the salt water unbenounced to me.
We continued on our multi-month trip in the Bahamas, and one evening I noticed a tiniest thin line of oil film coming from under the boat as we were returning from shore.
I dove under the boat and discovered the rust and the tiniest little drop of oil popped out… about a minute later another drop.
JB-Weld Underwater to the rescue! I sanded off all the rust and onto the undamaged epoxy/glass, got back on the boat and kneaded the JB-Weld putty, dove under and massaged the putty into the hole and over all the exposed steel, and crossed my fingers that it would work.
I checked it regularly (any excuse to dive in the Bahamas) and it held for the next 3 months until we were able to pull the boat, weld the hole, and repair the epoxy/glass that protects it.
Now, when I anchor in conditions where my rode could wrap around the keel I lower a kellet about 2 ft lower than my keel.
It keeps the rode below the keel to prevent it from wrapping around the keel.