Is painting a boat’s hull a job for an amateur painter? Should a mono-urethane or two-part linear polyurethane (LPU) be used? Practical Sailor is often asked these questions. Our answer? That depends on the painter and the paint.
With the right tools, research, and enough time and patience, any boat project is a manageable do-it-yourself endeavor. However, most of us lack the tools, time, and know-how to tackle all of the repairs and maintenance our boats require. The key is to only take on those projects that most realistically match our skills, budget, and schedule. But the trick is accurately assessing one’s own skill level and the difficulty of the task at hand.
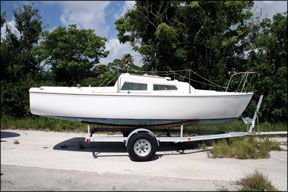
So when it came time to freshen up the topsides of our long-neglected Catalina 22, Jelly, we weighed the pros and cons of doing it ourselves versus paying a yard to spray on some Awlgrip.
Our duty to answer our readers oft-asked questions and our addiction to product testing-and perhaps an underlying masochistic tendency-won out, and we decided to mount an amateur encounter of the polyurethane kind. The mission was neither swift nor painless, but in the end, Jelly shined with a glossy new paint job, we tucked another project under our DIY toolbelts, and our readers (hopefully) will benefit from our hard-learned lessons.
The Jelly Adventure
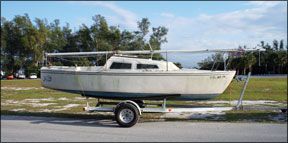
While our panel test (Practical Sailor August 2008) seeks out the most durable topside paint, this Jelly test was to determine which two-part LPU is the most user-friendly for the amateur painter and whether the project is manageable for the average do-it-yourselfer.
That meant trusting Jelly’s paint job to Practical Sailor s “amateur” staff, rather than banking on the talent of editors like technical guru and former boatyard manager Ralph Naranjo (who can handle a spray gun as easily as the rest of us handle fingerpaints). That in turn meant settling for a less-than-perfect finish, but it also ensured a true test of the products and techniques user-friendliness.
What We Tested
We chose to use the roll-and-tip painting method. It is less hazardous and requires less skill than spraying on the paint, but it does call for more deftness than brushing alone.
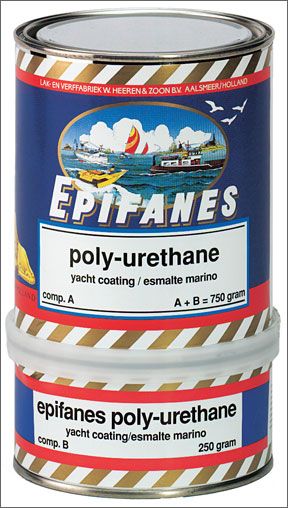
Testers selected two-part polyurethanes from manufacturers that historically have done well in Practical Sailors topside paint durability tests: Interlux and Epifanes. While Interluxs Perfection was released after our last test, its predecessor, Interthane Plus, took top honors for two-part white polyurethanes, and Epifanes Poly-urethane was named the best red or blue LPU in our four-year test published in the May 2006 issue.
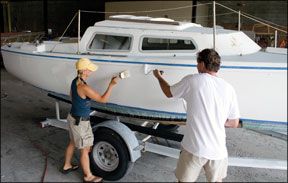
On Jellys port side, we applied Epifanes Poly-urethane No. 800 white thinned with Epifanes poly-urethane thinner, and on her starboard side and transom, we painted Interluxs Perfection Mediterranean White and used 2333N brushing reducer. (Both paints can be sprayed on, but different thinners are required.)
We also tested several fairing compounds, natural-bristle brushes, high-density foam rollers, and two-part epoxy primers. See page 29 for more on primers and preparation techniques, and look for reports on our brush and fairing compounds test in upcoming issues.
How We Tested / Painted
Before getting started on any first-time boat project, its a good idea to do some homework. We searched for application tips on the Internet, surveyed boatyard “experts,” and consulted our library of how-to books, the most helpful of which were “Boat Maintenance” by William Burr Jr. and “Sailboat Refinishing” by Don Casey. We browsed paint manufacturers websites and marketing literature for instructions and any helpful advice. And we raided the Practical Sailor archives for past tests and how-tos. (April 1, 1996; Feb. 15, 2002; May 2006; and August 2008 issues.)
The 1974, never-painted Jelly was in pretty sad shape. Hull shine was long gone. Her gelcoat was crazed in places; bare fiberglass showed through in other spots, and others still had deep gauges, pin holes, and scratches.
To properly prepare the hull for painting, much sanding, filling, and fairing was required, as were multiple coats of primer. (See “A Primer on Prep” on page 29 for specifics.)
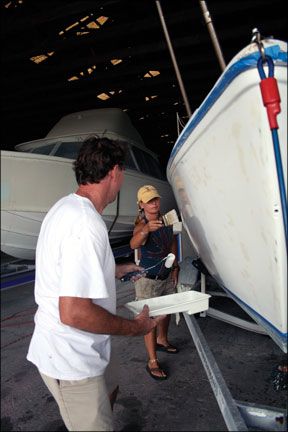
We followed makers instructions for surface preparation, priming, and application. The starboard side was primed with two coats of two-part Interlux Epoxy Primekote, and on the port hull, we applied two coats of Epifanes Epoxy Primer.
After priming, testers used blue dye to find any areas that were uneven and then sanded the hull with 220-grit sandpaper and a pneumatic dual-action sander (DA). After wiping down the hull with maker-specified solvents and tack a rag, it was time to apply the LPU paints.
Three coats of each product were rolled on using high-density, closed-cell foam sausage rollers and tipped with 3-inch Wooster and Epifanes (Omega) natural-bristle brushes. Testers wet-sanded between coats with 320-grit sandpaper, and wiped down with Interlux 202 and Epifanes thinner.
For most, two coats would suffice, but Murphys Law, uncooperative Florida weather, and amateur mistakes led to Jelly getting a third coat on each side.
To determine which DIY topside makeover system was more amateur-friendly, testers rated the products on the following criteria: how easy the product was to lay on, how forgiving it was, maker-supplied instructions, finish hardness, and initial gloss.
What We Found
For select jobs, you may find that one coat of Epifanes Primer covers well enough, but in our opinion, two coats of the Interlux Epoxy Primekote will always be necessary. We ended up doing two coats of both for better coverage in areas like Jelly’s blue bootstripe and where pink and gray fillers were used.
When it came to hand-sanding between coats, the Epifanes primer, like its LPU, was much harder to sand than the Interlux, but it also left a harder finish-a bonus for durability but a drawback during application.
There was a noticeable difference in the workability of the LPU paints. The Epifanes Poly-urethane had a tendency to dry much quicker than the Interlux, making it hard to keep a wet edge and easy to leave holidays. Adding thinner dropped the viscosity too much. Perfections “open” time (time where it can be brushed without leaving marks) was significantly longer than Epifanes, a major bonus for the novice.
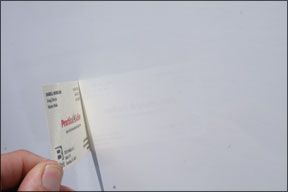
Both paints pulled together well as they cured, but the Perfection seemed more forgiving, in our opinion. In some spots on the Epifanes side, the brush strokes never pulled together. (Admittedly, this may have been an application hiccup, but the goal here is to identify the most amateur-friendly coating.)
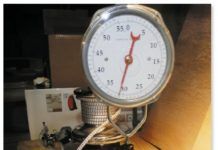
Both paints offered acceptable gloss, not exactly a slick, sprayed-on shine, but better than expected. Reflection tests showed Epifanes Poly-urethane to have the upper hand in gloss ratings. (See photos, page 30.) The difficulty testers had in sanding the Epifanes (primer and LPU) is a testament to its hardness.
Epifanes does offer detailed instructions, but we prefer Interluxs idiot-proof approach with spelled-out, step-by-step directions on the cans and downloadable information, including how-to videos, on its website. Epifanes offers limited application tips online.
Lessons Learned
The Jelly topside project was not without its stumbles, but rather than recount all the things that went wrong, we offer this brief rundown of knowledge gleaned from the experience.
The right tools and supplies make the job easier: Don’t skimp on sandpaper or brush quality; use a soft, wide, full brush with natural bristles (expect to spend $30-$40 for a good brush); use maker-specified solvents.
Prep brushes and rollers by going over them with tape to remove lint, fuzz, and stray bristles. Clean brushes immediately after finishing a coat.
Paint a white hull white; a dark paint could result in print-through.
Be aware of the weather: Do not paint in the direct sun, and if you live south of the Mason-Dixon, buy plenty of thinner. As the humidity climbs, so will the paints thirst for thinner. (You’ll also want to have enough for cleanup.)
Keep an extra clean brush and extra paint on hand in case one brush gets dropped or paint spills during application. Wet the ground around the boat to keep dust down.
Try vertical and horizontal tipping. For Perfection, Interlux recommends rolling vertically and tipping vertically, but we had better success rolling vertically and tipping horizontally.
For more tips, check out the “DIY Notebook” from the August 2008 topside paint review. Also, look for it with the online version of this article at www.practical-sailor.com.
Conclusion
For amateur do-it-yourself application of a two-part LPU, we recommend Interlux Perfection. Its more forgiving than its Epifanes counterpart, and idiot-proof instructions are easy to come by. Epifanes Poly-urethane, a harder, glossier finish, is worth considering for the more advanced painter or for those hiring a pro.
Is the super-slick look of a professional, sprayed-on Awlgrip job achievable for the beginner with a roller and paint brush? Not without a fair amount of practice at roll-and-tipping and experimenting with flow. If a mirror-reflection is the look you want, hire a pro.
If you’ll be happy with a finish that’s not-too-far from perfect but perfect from afar, then try your hand at self application. DIY topside painting is a feasible project with the right product, but we do recommend practicing on a fiberglass dinghy, rudder, or piece of glass before touching your hull.
All told, the projects two testers spent about 60 hours prepping, priming, and painting. We estimate the supply cost to be about $450 for the whole project-a savings of $1,000 or more over having it professionally prepped and painted.
So was the Jelly test worth it? While were much happier now that Jelly has a fresh face, getting her there was a tough road. We learned a lot along the way, and take pride knowing that her clean look is a result of our hard work, which afterall, is the DIYers mantra, is it not?
Now that we’ve recovered from all that sanding and the white paint has finally come off our fingernails, were turning our attention to one-part topside paints. We plan to paint Jelly’s decks and the hull of our O’Day Javelin test boat with Epifanes Monourethane and Interlux Toplac one-part paints. Stay tuned for more tales of topside fun, including our one-year update of the long-term panel test.














My experience with using both brands was opposite to yours. The gloss achieved with Epifanes was superior and weather did not affect the result.
Thanks Rob. The gloss was better with the Epiphane in our test, too. “Reflection tests showed Epifanes Polyurethane to have the upper hand in gloss ratings.” Testers were impressed by the gloss and durability of Epiphanes, but the focus of this test was identifying novice-friendly solutions. At the time of this test, Interlux’s support in this area was slightly better based on the independent experiences of three novices we enlisted for help in the test. However, for someone who is more confident with their skills, or an amateur who is patient enough to do some mixing and applying trials, the Epiphane delivers outstanding gloss and a harder finish. For different perspectives on DIY painting we have many articles on this topic, including DIY spray painting, which is included in the article “Topside-Paint Endurance Test 3-year Checkup.”
2 part poly’s are definitely harder than mono urethanes . So I think they are a better choice for top sides. I’ve used both on 3 different boat restoration jobs. Interlux is very sensitive to weather. The mono urethane will not gloss up in all but the perfect humidity and temperature conditions. Epifanes is a totally different experience.
They now recommend just rolling with a foam roller. I agree! The result is a spray like finish. Don’t tip it off.
Interlux 2 part kicked too fast and left orange peels on one job I did.
Epifanes is very easy to patch repair. Your going to scratch your new paint work. This feature is very important.
My vote is for Epifanes. Hands down!
No gloves, no skin protection, no vapour masks????
It’s not necessary if you are outside. And probably not if you are inside. The stuff is very user friendly, much like painting your house. If you are spraying that is another story.
If you can smell the solvents, you are breathing the solvents. Read the SDS and make your own choice. The aggressive reducers and isocyanates in the converter are not something that I wish to have in my bloodstream.
In regards to spraying any 2-part paint, the isocyanates in the mist reach a hazardous level before you can smell any solvents. A simple elastomeric mask with an organic cartridge is not good enough – you need external air and a bunny suit. Even then, you will feel like crap after with enough blowback from things like painting the inside of a transom corner.
Regarding the last paragraph, has Toplac been discontinued? It’s not on Interlux’s site or at retailers I checked.
A tool to consider (in my opinion the only one) is a paint edger with thousands of short bristles woven in (not glued) to the pad. This tool instantly gives you a perfect and even finish with vertical strokes as if you had brushed many times, without opening the paint so working time and live edge are extended. It pulls the paint into an even layer that looks sprayed. The paint not being tacky, no bristles are left behind. Rolling is a drippy and messy way to get the paint to the surface by comparison and an, as it turns out unnecessary. Every batch needs a new pad in the tool but pads are inexpensive.
Hi this is interesting idea. So I was intending to just roll but not tip as recommended for two part poly Epifanes paint. You’re saying that a paint edger would work best in application instead of rolling?
After long-boarding, yes my arms still ache, and 3 coats of Interlux Perfection, White, rolled & tipped with help, my ’55 Rhodes often gets the comment “Is she wood?”
2 part poly’s are definitely harder than mono urethanes . So I think they are a better choice for top sides. I’ve used both on 3 different boat restoration jobs. Interlux is very sensitive to weather. The mono urethane will not gloss up in all but the perfect humidity and temperature conditions. Epifanes is a totally different experience.
They now recommend just rolling with a foam roller. I agree! The result is a spray like finish. Don’t tip it off.
Interlux 2 part kicked too fast and left orange peels on one job I did.
Epifanes is very easy to patch repair. Your going to scratch your new paint work. This feature is very important.
My vote is for Epifanes. Hands down!
I did the coach roof of my 1968 Ohlson 38 using Epifanes Poly.
One thing I did not see mentioned was flattening agents. I wanted a flat finish. Epifanes has flat paint pre-made, no need to add it and mix in later. A step saver.
I did not find any problem with keeping a wet edge. I found it stunningly easy to mix and apply. For rolling, I found the Epifanes foam rollers the only ones that did not swell as you used them!
I stripped the old paint down to the fiberglass / wood / aluminum. Removed everything that could be removed, painted parts at home. Reassembled everything.
I was amazed how well the paint leveled out. Rolled and tipped great. The epifanes anti-skid was wonderful. Not having to mix flattening agent in was great!
Being the first time I did any paint job on a boat, I was stunned how good it looked. Had one friend call me a liar. Saying there was NO WAY a DIY paint job could look that good!
On it’s 5th season on the water, still looks as good today, as it did when I first applied it.
The Epifanes paint is TOUGH!
the url to my pictures of the entire paint process is here https://www.facebook.com/media/set/?vanity=ohlson38project&set=a.728673937268497