


Spring will be here sooner than we think, so I am plunging once again into polishing and waxing fiberglass boat hulls. This post covers almost everything you need to know about cleaning, polishing, and waxing gelcoat. It includes links to our online “how-to” resources and links to our tests of various classes of products mentioned. The main purpose of the article is to provide an overview of the many archive articles we have in our library on this topic, so that you can choose which reports best apply to your situation and then dig in as deep as you like. A separate blog post “Extend the LPU Life with a Few Basic Steps,” addresses ways to protect hulls that have been painted.
Most of these articles can be found by using the search bar at Practical Sailor or by using Google search and entering “Practical Sailor WAX” or the “Practical Sailor GELCOAT” or “Practical Sailor POLISH.” If you’re serious about protecting your investment and prefer to have all our research in one, easy-to-access eBook, then check out Marine Cleaners: The Complete Series.
Before digging into the topic, I should mention that there are those, like Tech Editor Drew Frye (aka our “Chief Executive Penny Pincher”), who question the value of polishing and waxing a gelcoat hull. In Drew’s view, keeping the boat clean is usually enough, and that if you were to compare 10-year old gelcoat that had been meticulously polished 2-4 times each year to one that wasn’t polished until its 10th year, the only observable difference would be a thinner gelcoat on the boat that was frequently polished.
Sure, all plastics break down over time, but most modern gelcoats have UV inhibitors and other components that delay this process. After all, gelcoats are designed not only to present a gleaming surface that delights the eyes of humans, but to protect against the elements. Local environmental factors— air quality, acid rain and sun exposure—can effect the need for protection, of course. Drew, who lives and boats in the Chesapeake Bay Area, recently wrote an extensive report on the various plastics found on boats, their uses, and what we can do to prolong their working life.
There are several ways to attack the buff-and-wax ritual, and I would not say there is one right way for everyone. However, some approaches do get better results than others. I would categorize the types of wax jobs like this:
1) The quick-and-dirty boat wax job, for the full-time cruiser who just wants to protect the boat’s gelcoat from further degradation, prevent gelcoat stains, and make boat-cleaning jobs easier.
2) The perfectionist wax job, for the sailor who wants all of the above, plus wants the boat to look its glossy-best.
3) The in-between wax job, for the sailor who wants his boat to look good, but not at the expense of adding an extra day to his haulout or lay-days.
And certainly, the condition of the boat has a big impact on how you approach the project. If you’re bringing a boat back from the dead, the quick-and-dirty wax job is not really an option (although some makers of “miracle products” would lead you to think differently). You must be prepared to put in some elbow grease.
No matter which category you are in, your waxing job will have three basic steps:
1) Cleaning: This includes getting rid of salt, dirt, grease, mold, stains. You could break this down into various stages, depending on the condition of the hull, general cleaning and stain removal.
2) Polishing: This creates the smooth glossy surface to be protected. If you have an old hull, there could be several stages to this process. We recently tested a boxful of polishes, and I offered some tips in a recent blog post on polishing.
3) Waxing: This is the application of a thin polymer or natural wax coating to seal and protect your polished gelcoat.
The important thing to remember is that if your hull is not clean before you begin polishing or waxing, you might drive dirt further into the pores of the gelcoat. Not the end of the world, but you won’t get the best results.
For general background, I recommend two good reads from our archives. Both are written by Nick Nicholson, a former editor at Practical Sailor, who is now involved in a number of big sailing events, including the America’s Cup, the Newport-Bermuda Race, and the Volvo Ocean Race.
For a broad look at how the sun affects plastics and why we should protect our gelcoat, check out Plastics Versus the Weather: The Nature of Losing Battle.
For a gelcoat care overview, read Nick’s piece on restoring an old boat, “Offshore Log: Gelcoat Maintenance“. Note that he polished by hand, which I don’t recommend for larger boats, particularly if you use one of the harder paste waxes. Most maintenance wax jobs won’t need all the steps here.
I also offered some quick tips to gelcoat repair using a Preval sprayer in a recent blog post.
Tools to Use for Polishing Your Boat
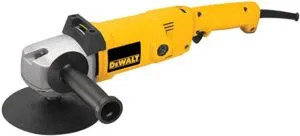
Your biggest investment will be a good polisher. We’ve looked at various options, ranging from cheapos to mid-priced powertools aimed at the automotive market, to higher-end tools geared specifically for use on boats. Lately, for polishing, waxing, and buffing, we’ve been using a Dewalt variable-speed polisher, the DeWalt DW849, with a 3M 3M-05705 Superbuff Polishing Pad and the 3M-05710 Superbuff Adapter (used to fit pads on any standard 5/8-inch shaft slow-speed polisher).
An inexpensive variable speed polisher from Chicago Electric is worth looking at. This one rattles and hums, but it works. Ours is still working, but it gets used only twice a year. Harbor Freight also has 7.5-inch wool buffing pads to match for much less than the 3M versions.
There is also a marine-tailored, small-diameter, dual-action polisher from Shurhold. This one helps avoid swirl marks and is relatively lightweight. It’s good for micro-finishing.

It has some nice features (like a built-in breaker, in case there is a fault in the circuit), and is sized to take the smaller 3M Finesse-It pads that 3M recommend for the Finesse It step below. Shurhold also makes its own buffing compound, Buff-Magic.
Machine Technique
I generally apply the compound and wax by hand, using a basic microfiber round waxing pad. I then use the Dewalt to compound and remove wax. The key is to go very light at a low-RPM. I often will buff again with one of those really soft “lambswool” buffing pads, or a microfiber cloth by hand. Good polishing products will designate the RPM-range that is suitable. Start at the low end of that range. Local boat maintenance guru Nelson Roberts shared his polishing techniques with us in a recent blog post “Buff Your Hull Like a Pro.”
General Cleaning
Wash thoroughly, removing all oil and grease. Our recent test of boat soaps found some clear winners, including some environmentally friendly products that can be safely used on boats in the water. Keep in mind, however, that if you want to get rid of your old wax, many boat soaps are mildly formulated so they will not remove waxes. For this stage of cleaning, Nick likes Simple Green—which does remove most waxes. He dilutes as needed. You could do the same with one of the recommended cleaners below in our multipurpose cleaner test, which included some eco-friendly choices.
For serious stains, spray your chosen cleaner undiluted. Note that ALL of the spray cleaners in our last multipurpose cleaner test removed wax.
For mildew, chlorine is the ticket. Outdoor Clorox works well. You can also try some of the best products in our last mildew cleaner test, which included some more eco-friendly solutions.
If grease or exhaust soot is the big problem, then a degreaser will also work.
Serious Hull Stains
Mild acids are very effective at attacking serious stains that don’t respond to the above treatments. Used incorrectly or in strong concentrations, acid cleaners can harm gelcoat, so use it sparingly and follow directions. Do a test patch first, and be sure to rinse thoroughly. Also, be sure to cover a trailer well as it will take galvanizing and even paint off. Keep away from paint and varnish. Clearly, it is better to do all of your hull cleaning before painting the bottom.
Nick liked the Davis FSR gel, here’s our complete report on on 22 different hull-stain cleaners.
For a softer, more eco-friendly cleaner check out RidLyme.
Cleaning Solvents
The above multi-purpose cleaners should have eliminated any grease or dirt that would interfere with polishing and waxing, but some, like Don Casey in his classic DIY guide “This Old Boat,” mention solvents. I personally don’t do this step unless I’m planning on painting, but there is nothing wrong with taking the extra step.
Casey recommends MEK over acetone. Interlux 202 Fiberglass Solvent Wash is another one that we’ve used. It seems to evaporate a little slower down here in Florida. If you are considering using solvents—something almost every boater does at some point—three reports are worth reading. These reports, compiled by Drew, a chemical engineer, will help save you money and keep you safe: Making Sense of Solvents, Four Solvents for Nearly Every Paint Job, and Boatyard Chemical Wisdom.
Also, we are looking at some “green” dewaxing solvents now from RPM technologies although these appear aimed at the industrial market. If you’re worried about residue from silicone from waxes or sealants spoiling adhesion for a painting or varnishing project, Re-Mov performed best in our last test of adhesive removers.
For a deeper dive into the subject of hull cleaning, including a discussion of the active agents and how they work, see The One-Bucket Cleaning Kit. In that report, Editor Drew Frye shows readers how they can use basic chemistry to create a super-cheap DIY cleaning kit that will take care of any stain or cleaning challenge.
Polishing Your Hull
Once you are assured you won’t be driving grease and dirt deeper into the hull, you can begin polishing, or compounding. Be sure to wear goggles and a P-95 particulate respirator while doing this step. This process also removes any remaining old wax. Many wax manufacturers have a specific product that also includes a cleaning component (often petroleum-based) to get rid of grease and dirt. Collinite’s Boat Cleaner 920 is an example.
How aggressively you want to polish your hull will depend on the hull condition. This bears repeating: If you need an abrasive, start with the least aggressive grit required. On a severely neglected hull, you could ultimately need to wet sand with 800 grit wet-dry paper, followed by finer grits and then polishing compounds — but start try first with the buffing compound first before turning to more aggressive grits. Every time you use abrasive your hull, you are removing gel coat. If you’ve been waxing your hull regularly, and see no signs of oxidation, you might not even want to buff and skip to micro-finishing or waxing. Or, you could combine the buff and wax process into one with a one-step cleaner wax. We tested cleaner waxes back in 2007.
We tested heavy duty rubbing compounds in 2014, and that report highlights some excellent products like Mirka Polarshine that will save you a great deal of time if you’ve got a lot of acreage to buff. Whether you call them buffing compounds, rubbing compounds, or polishes, they all work basically the same way: they contain a mild abrasive suspended in a liquid or paste that lighter abrades away surface imperfections and oxidation. The current trend is toward water-based products like Aqua Buff, which contain no petroleum distillates, but this product did not do nearly as well as others in our test. Whatever compound you use, start with the mildest (highest # grit) that you need. Again, you don’t want to remove more gelcoat than necessary.
For what power tools to use, see the power tool details above. In addition to the Superbuff pad mentioned before, I have also used 3M hook-It Velcro pads for polishing. In any case, I smear polish on the hull with a foam waxing pad and go VERY LIGHTLY at a low RPM. 3M recommends 1,000-1,500 RPM for its compounds. Keep the polisher moving to avoid heat buildup or over-polishing.
Micro-Finishes/Glaze
Many people skip this step, but I find it produces a better gloss if you do it, particularly when trying to restore the gloss to an older boat. We have not tested this product category. Essentially, this is an even finer polish than those used for compounding. For this, I use 3M Finesse It II. Several of the automotive-oriented waxes in our liquid wax test have similar products. On a small boat, you can apply it by hand, but I do it by machine. Again, apply light pressure and use a slow RPM, being careful to follow the instructions. Do a small area at a time.
Boat Wax
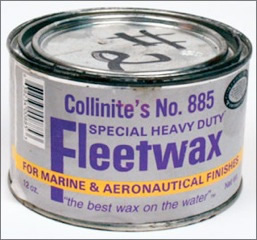
Now that your hull is shiny, it is time to protect it. We’ve tested dozens of liquid waxes and paste waxes. Generally, the pastes offer harder protection that lasts longer and the liquids are easier to apply and last almost as long. I generally stick with the Collinite 885 paste wax. Contributing editor Frank Lanier, who waxed his hull by hand, found it too much work and was quite happy with a liquid polymer from Mother’s. A number of readers swear by the Nu Finish.
I usually use the the same tools I used for compounding, although I change to a clean pad. I usually apply the wax by hand using a foam microfiber pad, and then buff with the machine. Work in small areas. Don’t let the Collinite 885 dry too hard, or it becomes hard to buff. Also, don’t lay it on too thick. If you work in cooler temperatures, this can be a tough product to apply, but you can warm up the can slightly to soften it up. Usually, I have to go over the hull twice to get the shine. Sometimes I’ll switch to a very soft buffing pad for this last step.
To help with your selection of waxes, here is the one-year report on Liquid Waxes.
And the six-month report on paste waxes.
And finally a resource for choosing non-skid waxes.
Jamestown Distributors has a pretty good video on refinishing an old hull using the 3M system. It’s pretty heavy on the 3M products ads. Often, you can do just as well with products from your local Finish Master or similar auto-refinishing place. Jamestown also sells a pretty good polishing kit that has everything you need, including the polisher.
If you have any questions on this topic or advice you’d like to share, post in the comments below or write to me at [email protected]. And if you’re considering painting your boat, check out our most recent edition to the e-book library, Painting Your Boat. I personally compiled and edited this e-book based on my own experience stripping six layers of paint off my 52-year-old Yankee 30 and repainting it from keel to coachroof.
And if you’re just planning to clean and polish your boat, the complete series on Marine Cleaners will put you on the path to reviving your old boat and making it look like new.


I see that the techniques for polishing the boats used by your professional service, I appreciate your work.
Great article! Always great to see professionals sharing their knowledge! Keep it up you guys!
Any suggestion how I can polish and wax the boat hull in water? I haven’t taken the boat out for service yet.
This is what we’ve done with our sailboat the last couple seasons. We just get in the dink and do it. I do use a battery powered Worx buffer though. Easier and less risky than using our corded Shurhold. I’ll use that when doing the topsides though.
Fantastic article and a great list of tips for cleaning and polishing your boat. I agree with your recommendations and appreciate that you posted this. There are many grateful boat owners for sure.
Hi there, Very informative post, thank you for taking the time to write this all out!
These boat polish reviews are the key essential facts I may have opted to put together to buy my choice. These key essentials lead to a well-informed purchase.
Hi Darrell! Very nice article you put together here. Glad to see that you added in the steps involved before you actually begin to do any polishing or waxing. Very important to be working with a clean boat surface before starting this process. New detailers will always make the mistake of thinking the hull looks clean, and don’t realize that salt air is still on the gelcoat surface and they just grind that right into the boat and do not get the quality results they would have if they would have washed the boat properly.
Appreciate the info. I will be checking out a few of the products you have mentioned here for sure.
Thanks again!
Cleaning with water and detergent, sanding if necessary, polishing, and waxing are the steps I need to take. It simply shows that the procedure of how to polish a boat is easy. Thank you for your writing page. It helped me a lot
The “Marine Cleaners” link is dead.
Darrell, I would like to see an article dedicated to cleaning ,polishing ,& waxing of a painted hull topsides instead of Gellcoat.
How do the ceramic products compare to waxing. Are they worth the cost and effort?
I’m not sure about exterior applications but the ceramic floor finishes are extremely tough. We have used the Bona brand and found it almost impossible to sand off later because the microscopic ceramics are as tough as aluminum oxide sanding grit.
Caveat:
Most of the article does not apply to the two-part hull or topside paint such as Awlgrip and will cause damage to the paint. However, a report on the do’s and don’ts for maintaining two-part hull/topside paints would be welcomed as many boats use these paints.
Busting my aging butt, shoulders and bad knees applying wax and supporting a buffer is not for me. I see those guys in the boatyard busting their humps and try to get them to see the light.
I strip my hull using a high quality floor stripping liquid. Spraying it on with either a handheld spray bottle or garden sprayer (takes a few minutes), then merely wiping off with a sponge and sometimes a very light scrubbing pad as well as a strong stream of water. Max time 1/2 hour for my 33 footer. Then I use a hand applicator to apply several coats of high gloss floor wax. It dries very quickly. I start at the bow and repeat before switching to the other side of the boat. The up and down on the ladder is the hardest part of this.
It’s very easy to apply and typically lasts at least 2 years. I’ve been accused in the past of having new gel coat. Hey, if it’s made to be walked upon, then it’s tough enough for my hull.
Chemically the floor wax is close to liquids such as Poli-glo, basically an acrylic wax/coating. As we get older , easy on and easy off us important, especially when it makes your hull shimmer.
I never see any articles on ceramic coating your boat. I have just ceramic coated my second boat in August (it will be ready for a maintenance coat in May).
My 2014 27 foot boat was ceramic coated and a maintenace coat applied approximately every 6 months. The boat looked as good as new (really) when I sold it at 7 plus years old.
The maintenance coat on the 27 footer took about 2-3 hours to apply but I know the 40 footer will probably take most of a day.
I think it would be a service to your readers to test ceramic coating as an alternative to wax.